GCP 建立 project with terraform 小記

OS: openSUSE Leap 15.6
Terraform: 1.9.5
隨著雲端專案越來越多, 自動化工作就越來越重要, 雖然不同的雲端平臺有各自的 CLI tool 或是 SDK, 但是有些行為是一連貫的, 從早期的 ansible, 到現在的 terraform, 都需要有工具來進行標準化的執行.
今天就來實作使用 Terraform 建立 GCP 專案 ( project )
來講一下, 爲何要先寫這一篇
在 GCP 建立 project 是非常方便與迅速的, 相對於 AWS ID 建立要有 payment 與 驗證
使用 Project 可以輕鬆劃分不同專案的資源與費用, 對公司內部費用歸屬很重要
實際在建立 project 時, 會調整一些預設值, 例如 VPC
準備事項
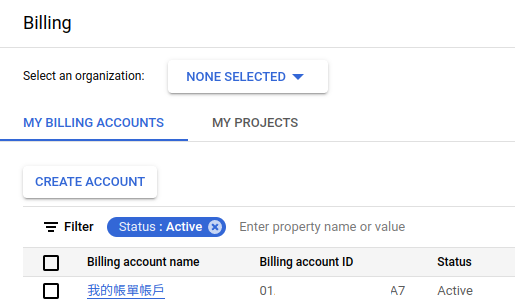
已有 GCP 環境, 確認自己的 Billing acount ID
可以在專案 -- > 點選 Billing -- > MANAGE BILLING ACCOUNTS
已安裝 Terraform
然後 Terraform 的驗證方式, 我是採取 ADCs ( Application Default Credentials )
可以參考之前的文章 https://sakananote2.blogspot.com/2024/01/gcp-authentication-with-terraform-adcs.html
場景是在自己的 workstation 優點是不用每個專案都建立 Service account 與設定權限
所以 provider.tf 內我也不會寫 credentials 的 json 檔案位置
接下來說明設定的檔案
官方文件
variables.tf 檔案內容
variable "gcp_project_id" {
default = "sakana-20240915-2"
}
variable "gcp_project_name" {
default = "sakana-20240915-2"
}
variable "gcp_billing_account_id" {
default = "YOUR-BILLING-ACCOUNT"
}
# 組織 ID 視狀況設定
#variable "gcp_organization_id" {
# default = ""
#}
這個檔案放我們要設定的變數內容
gcp_billing_account_id 的 default 內, 請替換你的 Billing accout ID
id 與 name 按照你的需求設定名稱與 ID
provider.tf 檔案內容
# 配置 Terraform 使用 Google 提供者。
terraform {
required_providers {
# 定義 Google 提供者及其來源。
google = {
source = "hashicorp/google"
}
}
}
provider "google" {
# credentials = file("${credentials}")
# region = "asia-east1"
}
這邊很簡單的設定 GCP 提供者與來源
因為使用 ADCs, 所以沒有設定 credentials
project.tf 檔案內容
# 建立一個 Google Cloud 專案資源。
resource "google_project" "create" {
# 不要自動建立網路,預設值為 true。
auto_create_network = false
# 專案的標籤,預設為空字典。
labels = {}
# 專案顯示名稱,使用變數 project_name 的值。
name = var.gcp_project_name
# 專案 ID,使用變數 project_name 的值。
project_id = var.gcp_project_id
# 組織 ID,註解掉表示不設定。
##org_id = var.gcp_organization_id
# 專案的計費帳戶,使用變數 billing_account 的值。
billing_account = var.gcp_billing_account_id
# 設定資源操作的逾時時間,目前為空字典,表示使用預設值。
timeouts {}
}
這邊有設定 auto_create_network 爲 false , 原因爲
實務上使用 GCP 應該會在固定的 region, 不會全球都用
Default VPC 網段應該跟地端網管確認是否有重複, 否則之後串 VPN 會有問題, 另外不同 GCP 專案 Peering 也會遇到一樣的問題
官方文件 https://registry.terraform.io/providers/hashicorp/google/latest/docs/resources/google_project 有提到建議使用 constraint 處理
terraform 的處理方式是會建立 GCP project 與 default VPC, 然後再進行刪除 default VPC
建立方式
修改 variables.tf 內的 billing account id / project name / project id
初始化 terraform
> terraform init
Initializing the backend...
Initializing provider plugins...
- Finding latest version of hashicorp/google...
- Installing hashicorp/google v6.2.0...
- Installed hashicorp/google v6.2.0 (signed by HashiCorp)
Terraform has created a lock file .terraform.lock.hcl to record the provider
selections it made above. Include this file in your version control repository
so that Terraform can guarantee to make the same selections by default when
you run "terraform init" in the future.
Terraform has been successfully initialized!
You may now begin working with Terraform. Try running "terraform plan" to see
any changes that are required for your infrastructure. All Terraform commands
should now work.
If you ever set or change modules or backend configuration for Terraform,
rerun this command to reinitialize your working directory. If you forget, other
commands will detect it and remind you to do so if necessary.
會下載相關資源
確認執行內容
> terraform plan
Terraform used the selected providers to generate the following execution plan. Resource actions are indicated with the
following symbols:
+ create
Terraform will perform the following actions:
# google_project.create will be created
+ resource "google_project" "create" {
+ auto_create_network = false
+ billing_account = "YOUR-BILLING-ID"
+ deletion_policy = "PREVENT"
+ effective_labels = {
+ "goog-terraform-provisioned" = "true"
}
+ id = (known after apply)
+ name = "sakana-20240915-2"
+ number = (known after apply)
+ project_id = "sakana-20240915-2"
+ terraform_labels = {
+ "goog-terraform-provisioned" = "true"
}
+ timeouts {}
}
Plan: 1 to add, 0 to change, 0 to destroy.
這邊我們沒有特別去設定 deletion_policy, 預設是 PREVENT, 防止誤刪 ( terraform destroy 沒辦法直接刪除, 需要手動刪除 )
使用 terrafom 執行建立專案
> terraform apply
Terraform used the selected providers to generate the following execution plan. Resource actions are indicated with the
following symbols:
+ create
Terraform will perform the following actions:
# google_project.create will be created
+ resource "google_project" "create" {
+ auto_create_network = false
+ billing_account = "YOUR-BILLING-ID"
+ deletion_policy = "PREVENT"
+ effective_labels = {
+ "goog-terraform-provisioned" = "true"
}
+ id = (known after apply)
+ name = "sakana-20240915-2"
+ number = (known after apply)
+ project_id = "sakana-20240915-2"
+ terraform_labels = {
+ "goog-terraform-provisioned" = "true"
}
+ timeouts {}
}
Plan: 1 to add, 0 to change, 0 to destroy.
Do you want to perform these actions?
Terraform will perform the actions described above.
Only 'yes' will be accepted to approve.
Enter a value: yes
建立完成之後, 到 GCP console 確認專案是否建立
順便到 VPC Network 確認是否有 VPC
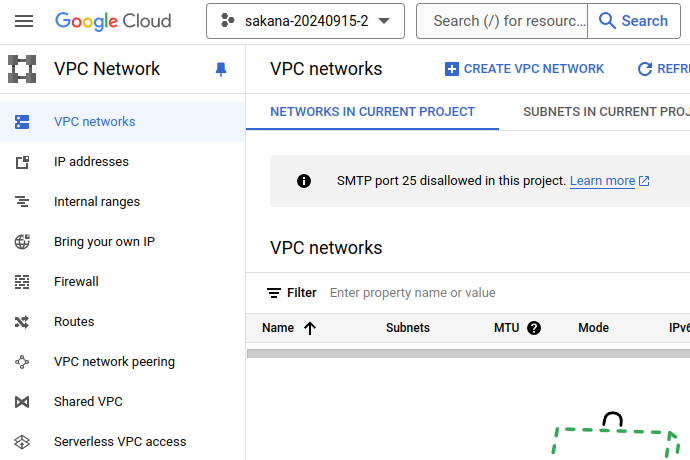
也同步將相關檔案放在 Github 上面
又向 terraform with GCP 前進一小步
~ enjoy it
References
沒有留言:
張貼留言