三大雲平台工具容器升級小記 - gcloud 406.0 / AWS Cli 2.8.5 / ansible 2.11.12
OS: container with openSUSE Leap 15.4
上次升級是 2022/4 , 這次會來升級的原因是
OS 更新到 openSUSE Leap 15.4
更新 gcloud 以及 AWS Cli 版本
Ansible 在 2.10 以後的版本, 有很多 module 被移動到 Ansible Collections, 也就是說現在不是如同 Ansible 官網上面的 pip3 install ‘ansible[azure]’ 的安裝方式. 接下來就是透過 collection 方式來進行安裝
參考網路上的文章 https://stackoverflow.com/questions/64921336/warning-ansible-2-10-3-does-not-provide-the-extra-azure
微軟官網文章 https://docs.microsoft.com/zh-tw/azure/developer/ansible/install-on-linux-vm?tabs=azure-cli
這樣也是好事, 之前也是因為這樣報了一個 issue ( 目前還是有 Bug, 持續回報中 )
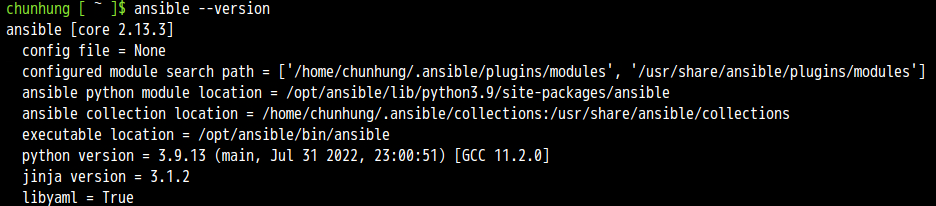
同步紀錄一下目前 Azure CloudShell 上面的 Ansible 資訊
Ansible: 2.13.3 / python 3.9.13
先整理結果
升級前
OS: openSUSE Leap 15.3
awscli: aws-cli/2.5.6 Python/3.9.11
gcloud: Google Cloud SDK 381.0.0
azure-cli: 2.35.0 (目前有 bug)
ansible: 2.11.10
升級後
OS: openSUSE Leap 15.4
awscli: aws-cli/2.8.5 Python/3.9.11
gcloud: Google Cloud SDK 406.0.0
azure-cli: 2.35.0 (目前有 bug)
ansible: 2.11.12
AWS CLI v2 安裝文件
GCP Cloud SDK 版本
另外執行 ansible --version 也會收到之後 ansible 需要 python 3.8 以上的告警, 訊息如下
[DEPRECATION WARNING]: Ansible will require Python 3.8 or newer on the controller starting with Ansible 2.12. Current version: 3.6.15 (default, Sep 23
2021, 15:41:43) [GCC]. This feature will be removed from ansible-core in
version 2.12. Deprecation warnings can be disabled by setting
deprecation_warnings=False in ansible.cfg.
這個部份應該是因為 openSUSE Leap 15.x 還是基於 SLES 15, 所以 python 的策略是還在 3.6, 只能先這樣
這次的做法還是會透過 docker build 指令來進行
我有比較過 docker build 以及使用現有的 docker image 修改後再使用 docker commit 建立的 image 大小還是很有差異的
Dockerfile 的部分我是拿之前的 Dockerfile 來修改目前是 openSUSE Leap 15.3
修改細節
Update time
Google SDK 版本還有下載的檔案路徑以及檔案名稱
列出 diff 的結果給大家參考
> diff opensuseLeap153_ansible_20220417_Dockerfile opensuseLeap154_ansible_20221022_Dockerfile
1,2c1,2
< # openSUSE Leap 15.3 with ansible, azure-cli, aws cli, gcloud
< FROM opensuse/leap:15.3
---
> # openSUSE Leap 15.4 with ansible, azure-cli, aws cli, gcloud
> FROM opensuse/leap:15.4
6c6
< # update time: 20220417
---
> # update time: 20221022
78,79c78,79
< RUN wget https://dl.google.com/dl/cloudsdk/channels/rapid/downloads/google-cloud-sdk-381.0.0-linux-x86_64.tar.gz && \
< tar zxvf google-cloud-sdk-381.0.0-linux-x86_64.tar.gz && \
---
> RUN wget https://dl.google.com/dl/cloudsdk/channels/rapid/downloads/google-cloud-sdk-406.0.0-linux-x86_64.tar.gz && \
> tar zxvf google-cloud-sdk-406.0.0-linux-x86_64.tar.gz && \
Dockerfile 內容如下
我檔案的名稱取名爲 opensuseLeap154_ansible_20221022_Dockerfile
# openSUSE Leap 15.4 with ansible, azure-cli, aws cli, gcloud
FROM opensuse/leap:15.4
# Author
# MAINTAINER 已經棄用, 之後要使用 LABEL 方式
# update time: 20221022
LABEL maintainer="sakana@cycu.org.tw"
# Set LANG for UTF-8 - for Chinese
ENV LANG C.UTF-8
# Install python3-pip, upgrade pip, ansible, boto, boto3
RUN zypper refresh && \
zypper install -y python3-pip && \
pip3 install --upgrade pip && \
pip3 install ansible && \
pip3 install boto boto3
# Install openssh, set ls alias
RUN zypper install -y openssh
RUN echo "alias ls='ls --color=tty'" >> /root/.bashrc
# Install wget, download azure_rm.py, set permission
RUN zypper install -y wget
# azure_rm.py no need to download
# Starting with Ansible 2.8, Ansible provides an Azure dynamic-inventory plug-in
# https://docs.ansible.com/ansible/latest/plugins/inventory/azure_rm.html
# old azure_rm.py URL https://raw.githubusercontent.com/ansible/ansible/devel/contrib/inventory/azure_rm.py
#
# Create working directory in /root
RUN mkdir /root/.azure && \
mkdir /root/.aws && \
mkdir /root/playbook && \
mkdir -p /root/.config/gcloud && \
wget https://raw.githubusercontent.com/sakanamax/LearnAnsible/master/template/ansible.cfg && \
mv /ansible.cfg /root && \
wget https://raw.githubusercontent.com/sakanamax/LearnAnsible/master/template/hosts && \
mv /hosts /root
#### Azure ####
# Install azure-cli
# 2020/11/29 Still have az login issue in Github https://github.com/Azure/azure-cli/issues/13209
RUN zypper install -y curl && \
rpm --import https://packages.microsoft.com/keys/microsoft.asc && \
zypper addrepo --name 'Azure CLI' --check https://packages.microsoft.com/yumrepos/azure-cli azure-cli && \
zypper install --from azure-cli -y azure-cli
# Install Ansible azure module
# After ansible 2.10, some module move to ansible collect, change install method
RUN zypper install -y curl && \
curl -O https://raw.githubusercontent.com/ansible-collections/azure/dev/requirements-azure.txt && \
pip3 install -r requirements-azure.txt && \
rm -f requirements-azure.txt && \
ansible-galaxy collection install azure.azcollection
#install vim tar gzip jq unzip less bind-utils iputils groff
RUN zypper install -y vim tar gzip jq unzip less bind-utils iputils groff
RUN echo "set encoding=utf8" > /root/.vimrc
#### AWS ####
# Install awscli v1
#RUN pip3 install awscli
#RUN echo "source /usr/bin/aws_bash_completer" >> /root/.bashrc
# Install awscli v2
RUN curl "https://awscli.amazonaws.com/awscli-exe-linux-x86_64.zip" -o "awscliv2.zip" && \
unzip awscliv2.zip && \
/aws/install
RUN echo "complete -C '/usr/local/bin/aws_completer' aws" >> /root/.bashrc
#### GCP ####
# Install google cloud SDK 381.0.0
ENV CLOUDSDK_CORE_DISABLE_PROMPTS 1
RUN wget https://dl.google.com/dl/cloudsdk/channels/rapid/downloads/google-cloud-sdk-406.0.0-linux-x86_64.tar.gz && \
tar zxvf google-cloud-sdk-406.0.0-linux-x86_64.tar.gz && \
/google-cloud-sdk/install.sh && \
echo "if [ -f '/google-cloud-sdk/path.bash.inc' ]; then . '/google-cloud-sdk/path.bash.inc'; fi" >> /root/.bashrc && \
echo "if [ -f '/google-cloud-sdk/completion.bash.inc' ]; then . '/google-cloud-sdk/completion.bash.inc'; fi" >> /root/.bashrc
使用 docker build 指令建立 image
> docker build -t sakana/ansible_opensuse154:20221022 -f ./opensuseLeap154_ansible_20221022_Dockerfile .
使用 -f 指定 Dockerfile 名稱
最後是 ” . “ 目前的目錄
這邊有個網路問題自己小記一下, 不知為何, 在家中如果是用固定 IP, 可能是有走 IPv6, 在執行 docker build 就有連線問題, 切成浮動 IP 或是先 ping 外部 就沒有相關問題, 日後再研究
測試 container image
> docker run -v ~/.aws:/root/.aws -v ~/.azure:/root/.azure -v ~/.config/gcloud:/root/.config/gcloud -it sakana/ansible_opensuse154:20221022 /bin/bash
測試結果 OK, 建立 tag
這邊目前因為 openSUSE Leap 15 使用舊的 azure cli 以及相依性, 所以現在 az 指令會有問題, 已經 update issue 以及花了很多時間調整, 目前還是要等 openSUSE and Azure 看是否會有後續更新
目前 az 指令可能會暫時透過 Azure cloud shell, ansible with Azure 目前有問題, 後面要再測試
觀察資訊
> docker images
REPOSITORY TAG IMAGE ID CREATED SIZE
sakana/ansible_opensuse154 20221022 d7eaacc18701 10 minutes ago 3.67GB
opensuse/leap 15.4 b59a33a9e95e 10 days ago 112MB
建立 tag
> docker tag d7eaacc18701 sakana/ansible_opensuse154:latest
登入 docker
> docker login
上傳 image
> docker push sakana/ansible_opensuse154:20221022
> docker push sakana/ansible_opensuse154:latest
完工, 以後使用就用
> docker run -v ~/.aws:/root/.aws -v ~/.azure:/root/.azure -v ~/.config/gcloud:/root/.config/gcloud -it sakana/ansible_opensuse154 /bin/bash
額外小記: 更新 blog 就會順道檢查 Azure 的認證資訊有沒有超過一年, 參考之前自己的筆記
http://sakananote2.blogspot.com/2020/05/azure-dynamic-inventory-with-ansible.html
使用 az ad sp list --all --output table | grep azure-cli 找出舊的認證,
刪除他 ex: # az ad sp delete --id d06f8905-ad21-425b-9da5-3e0bcf22a853
然後建立新的認證 ex: # az ad sp create-for-rbac --query '{"client_id": appId, "secret": password, "tenant": tenant}'
查詢 subscription_id, ex: # az account show --query "{ subscription_id: id }"
更新 ~/.azure/credentials 內的 client_id 以及 secret
~ enjoy it
Reference:
https://sakananote2.blogspot.com/2022/04/ansible-21110-aws-cli-256-gcloud-3810.html
https://sakananote2.blogspot.com/2021/12/ansible-2116-aws-cli-245-gcloud-3650.html
http://sakananote2.blogspot.com/2021/05/ansible-2109-aws-cli-224-gcloud-3400.html
http://sakananote2.blogspot.com/2020/11/ansible-2103-azure-module.html
https://sakananote2.blogspot.com/2020/11/opensuse-leap-152-container.html
https://stackoverflow.com/questions/64921336/warning-ansible-2-10-3-does-not-provide-the-extra-azure
http://sakananote2.blogspot.com/2020/08/opensuse-leap-152-container.html
https://sakananote2.blogspot.com/2020/05/aws-cli-v2-with-opensuse-leap-151.html
http://sakananote2.blogspot.com/2020/01/python-3-with-opensuse-leap-151.html
http://sakananote2.blogspot.com/2019/07/with-opensuse-leap-15-container.html
http://sakananote2.blogspot.com/2019/05/ansible-azure-cli-awscli-gcloud-with.html
http://sakananote2.blogspot.com/2019/11/with-opensuse-leap-151-container.html
