openSUSE Leap 15 正式版 安裝小記2
這次也是使用 USB 來進行安裝, 家中的 Leap 15 已經安裝半年
所以今天來裝公司的 Desktop
== 安裝過程小記==
這次建立的時候我還是選擇 GNOME 桌面
磁碟區分割的部分, 預設的引導行為
- 會建立一個 /boo/efi ( vfat )
- / 一樣使用 btrfs
- /home 使用 xfs ( 如果有勾選 )
- 這次感受上是把 swap 的部分擴增( 視 RAM 的大小, 讓系統可以暫停 )
安裝的內容, 我這次是全新安裝, 所以沒有匯入 SSH主機金鑰和組態
===============
Notes
- Ifconfig 預設沒有安裝, 要使用 ip address show
關閉GNOME裡面的搜尋功能(點選右上角的設定按鈕), 因為我覺得用不到

中文輸入法問題:
因為就算以安裝 中文輸入法也沒有出現
- 這次在系統內選擇中文輸入法有出現, 就先觀察 ibus 1.8
- 要習慣的應該是以 system_key( windows ) + 空白鍵 切換輸入法
- gcin 我一直都搞不定只好先用 ibus
取消 USB 為安裝來源:
# yast2 repositories
Google Chrome:
還是會有驗證性問題, 但是功能沒有差異
為了進行google 登入,先使用 Google 驗證App, 後面來處理yubikey
Freemind:
我是使用 editors 那個來源的 ymp 檔案安裝
安裝的頁面變得很漂亮
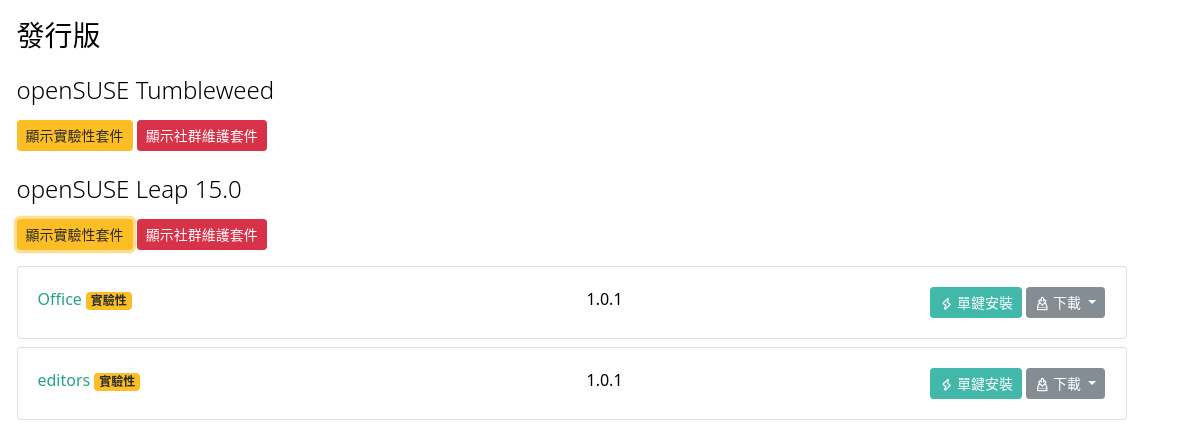
將.mm 的檔案指定用 freemind 開啟
新增 Packman 套件庫:
使用 #yast2 repositories 加入社群版本的Packman
#yast2 repositories
NCHC Packman 套件庫目前還沒有進行同步 Leap 15, 所以先觀察
Firefox Sync:
登入 Firefox Sync, 會處理之前有下載的 Plugin
flash-player:
# zypper install flash-player
播放器:
# zypper install vlc vlc-codecs
因為 mplayber 與 smplayer 不知道為何播放 .mp4 有點問題, 但是使用 VLC 就沒有問題
所以我就安裝 VLC Media player
- Mp4 codec 應該是要安裝 vlc-codecs, 需要 Packman 套件庫
並將 .rmvb 以及 .mp4 預設播放器設定為 VLC
安裝 ffmpeg ( 會把提供者從 openSUSE 換成 Packman )
# zypper install ffmpeg
這樣的好處是使用 youtube-dl 可以轉換 mp3 格式
透過 youtube-dl -F 來觀察可以下載的格式
> youtube-dl -F http://www.youtube.com/watch?v=13eLHrDcb1k
[youtube] Setting language
[youtube] 13eLHrDcb1k: Downloading video webpage
[youtube] 13eLHrDcb1k: Downloading video info webpage
[youtube] 13eLHrDcb1k: Extracting video information
Available formats:
22 : mp4 [720x1280]
18 : mp4 [360x640]
43 : webm [360x640]
5 : flv [240x400]
17 : mp4 [144x176]
指定要下載的格式進行下載 (請注意 -f 是小寫)
> youtube-dl -f 22 http://www.youtube.com/watch?v=13eLHrDcb1k
下載為 mp3
首先要安裝 ffmpeg 套件
>youtube-dl http://www.youtube.com/watch?v=13eLHrDcb1k --extract-audio --audio-format mp3
PDF Viewer 安裝:
Foxit
之前42.3 的 PDF Viewer 中文顯示有問題所以使用 Foxit, Leap 15 中文預設沒問題, 但是也是順手裝起來
- 下載軟體的 .tar.gz 然後以 root 安裝
Skype:
目前的版本是 8.34.0.78 的版本
下載 RPM 版本用軟體安裝就裝好了 :)
使用 #yast2 sound 調整音效
Dropbox:
目前版本 2.10.0
使用 # zypper install dropbox 來安裝
安裝完之後在終端機下 dropbox start -i 來安裝
修改 LS_OPTIONS 變數
# vi /etc/profile.d/ls.bash
把 root 的 LS_OPTIONS 的 -A 移除
.7z 支援:
# zypper install p7zip
imagewriter:
# zypper install imagewriter
用來製作開機 USB
hexchat:
# zypper install hexchat
以下為個人記事
rdesktop 安裝與測試:
#zypper install freerdp
執行方式
#xfreerdp -g 1280x1024 -u administrator HOST_IP
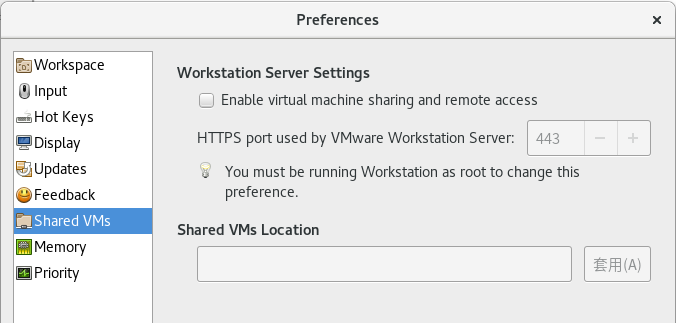
VMware workstation Pro 15:
安裝 kernel-default-devel
# zypper install kernel-default-devel kernel-source
# ./VMware-Workstation-Full-15.0.2-10952284.x86_64.bundle
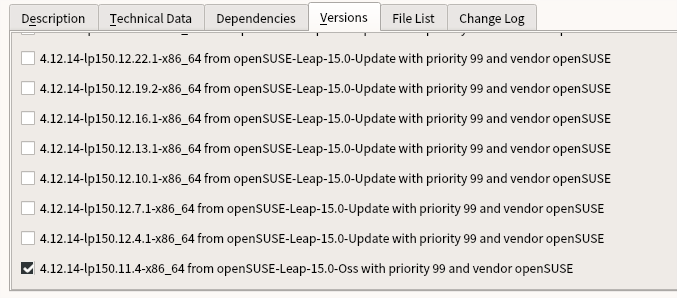
如果啟動的時候出現找不到 Kernel Header
# yast2 sw_single
點選 kernel-default-devel 套件, 點選 Versions 分頁, 勾選適當的 kernel 版本
取消 “Enable virtual machine sharing and remote access”
Yubico Key:
如果 linux 沒有抓到 Yubico 的 U2F Key可以使用以下步驟
作法
存到 /etc/udev/rules.d/70-u2f.rules
將 linux 重開機, 接下來就可以使用了 :-)
smartgit 安裝:
下載 smartgit-linux-18_2_3.tar.gz
解壓縮到 /opt
# tar zxvf smartgit-linux-18_*.tar.gz -C /opt/
建立 link 讓一般使用者也能使用
# ln -s /opt/smartgit/bin/smartgit.sh /usr/local/bin/smartgit
安裝 git
# zypper install git
建立 個人的 ssh key
> ssh-keygen -t dsa
將 ssh 的公鑰 id_dsa.pub 新增到 Github 的 Settings -- > SSH and GPG Keys
接下來就是以一般使用者的身份執行 smartgit 指令
> smartgit
這次沒有發生 一般使用者發生找不到 jre 路徑
解法, 目前是在 ~/.smartgit/smartgit.vmoptions 檔案內
將 jre 指向 /opt/smartgit/jre
> cat ~/.smartgit/smartgit.vmoptions
jre=/opt/smartgit/jre
按照上面的參考設定
# zypper install alacarte
設定 smart git icon 使用 alacarte
在設定好之後如果發現無法直接開啟資料夾 ( 資料夾上面按右鍵 -- > Open )
在 Edit -- > Preferences --> 點選 Tools -- > 點選 Re-Add Defaults 得到解決

ansible 安裝:
目前版本 2.5.1
#zypper install ansible
安裝 pysphere:
為了 ansible and VMware Module
使用 one-click 安裝
使用 server:monitoring 套件那個安裝
Docker 安裝:
目前版本 18.06.1-ce
#zypper install docker
將使用者 sakana 加入 docker 群組
#systemctl start docker
#systemctl enable docker
GNOME Extension:
參考調校小記
> gnome-tweak-tool
裝了
- TopIcons
- NetSpeed
Forticlient SSL VPN 安裝:
Dropbox 內2017/packages 的 source code
使用 forticlientsslvpn_linux_4.4.2323.tar.gz 內的 fortisslvpn.sh
Netowrk Manager:
#yast2 lan
更該預設為 Network Manager
- 調整印表機無線網路, 路由自動選項為關閉
印表機安裝:
# yast2 printer
Azure-cli 安裝:
版本: 2.0.54
匯入 rpm key
新增 Azure CLI 的 repo
# zypper addrepo --name 'Azure CLI' --check https://packages.microsoft.com/yumrepos/azure-cli azure-cli
安裝 azure-cli 套件
# zypper install --from azure-cli -y azure-cli
使用互動的方式登入 azure ( 現在已經不需要輸入機器碼, 直接驗證帳號就可以 )
> az login
Azure AKS 相關 :
安裝 kubectl
> az aks install-cli
Downloading client to /usr/local/bin/kubectl from https://storage.googleapis.com/kubernetes-release/release/v1.11.1/bin/linux/amd64/kubectl
Connection error while attempting to download client ([Errno 13] Permission denied: '/usr/local/bin/kubectl')
- 這邊失敗是因為我使用一般使用者, 對 /usr/local/bin 目錄沒有寫入權限
暫時性解法, 開啟 other 寫入權限, 然後等等再改回來
# chmod o+w /usr/local/bin/
> az aks install-cli
Downloading client to /usr/local/bin/kubectl from https://storage.googleapis.com/kubernetes-release/release/v1.11.1/bin/linux/amd64/kubectl
Please ensure that /usr/local/bin is in your search PATH, so the `kubectl` command can be found.
取得驗證資料
> az aks get-credentials --resource-group sakanaK8s --name myAKScluster20180724
Merged "myAKScluster20180724" as current context in /home/sakana/.kube/config
驗證一下
> kubectl get nodes
Visual Studio Core 相關 :
安裝 vscode
~ enjoy it
參考
沒有留言:
張貼留言