將GCP Stackdriver Alert 傳送到 telegram 小記
OS: container with openSUSE Leap 15.1
上次寫的是 “使用 Stackdriver 監控 GCE CPU 使用率, 超出監控值主動發出通知”, 通知的方式是 E-mail
那如果要更即時的方式呢?
所以接下來就來實驗透過 Telegram 來接受訊息 :)
首先要來建立 telegram bot
可以點選 以下網址 開啟 telegram
或是在 telegram 程式中
搜尋 @botfather

點選 START

接下來就會進入對話
也可以看到剛剛點選的 /start

輸入 /newbot 建立 bot
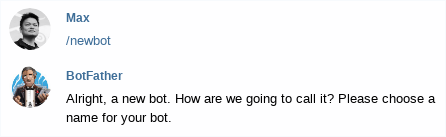
接下來會被要求輸入 bot 名稱, 這邊我以 sakana-gcp 為例子
輸入 sakana-gcp

然後是建立 bot 的使用者, 必須以 bot 結尾
我這邊以 sakana_gcp_bot 為例
輸入 sakana_gcp_bot
- 這邊的命名規則不給輸入 - , 所以我用底線


建立完成會給 bot 的 HTTP API TOKEN

整理一下
- Bot 名稱( 顯示名稱 ): sakana-gcp
- Bot 使用者名稱(帳號): sakana_gcp_bot
接下來觀察 bot 是否可以加入群組
輸入 /setjoingroups
- 預設是 Enable, 就是 bot 可以被加入群組
- 如果被要求輸入 bot , 要輸入的是 bot 使用者名稱, @sakana_gcp_bot

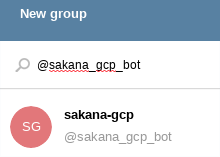
建立 Group

搜尋剛剛建立的 bot
點選 sakana-gcp , 點選其他要加入的人, 例如自己
點選 NEXT
輸入群組名稱
點選 CREATE GROUP 建立群組

接下來檢查是否可以查到已經加入群組的資訊, 以及 Group ID
使用 curl 指令 針對 bot 查詢資訊
> curl https://api.telegram.org/botYOUR_TOKEN/getUpdates
{"ok":true,"result":[]}
- 這邊的 YOUR_TOKEN 就是剛剛 @botfather 給的 TOKEN
- 如果result 是空的, 就把 bot 從群組踢出去再加入一次, 再試試看
從資料中取得 Group Chat ID
使用 curl 確認是否可以用這個 Group Chat ID 發送訊息
>curl -X POST "https://api.telegram.org/botYOUR_TOKEN/sendMessage" -d "chat_id=YOUR_CHAT_ID&text=my sample text"
- -X 是 request , -d 是 data
- 注意雙引號各把 host 以及 data 內容標示住
成功的話應該會看到訊息

Cloudfunction 部分
使用 container 方式來建立相關程式
- 要有 npm 套件, 等等在 container 內建立, 不影響自己環境
> docker run -v ~/.aws:/root/.aws -v ~/.azure:/root/.azure -v ~/.config/gcloud:/root/.config/gcloud -it sakana/ansible_opensuse151 /bin/bash
==== 在 contaienr 內 ( openSUSE Leap 15.1 with ansible and cloud tools ) ====
安裝 npm
# zypper install npm
Loading repository data...
Reading installed packages...
'npm' not found in package names. Trying capabilities.
Resolving package dependencies...
The following 8 NEW packages are going to be installed:
libicu60_2 libicu60_2-ledata nodejs-common nodejs10 nodejs10-devel npm10 system-user-nobody timezone
8 new packages to install.
Overall download size: 17.8 MiB. Already cached: 0 B. After the operation, additional 71.0 MiB will be used.
Continue? [y/n/v/...? shows all options] (y): y
建立 telegram 目錄
# mkdir telegram
進入 telegram 目錄
# cd telegram
建立 index.js
# vi index.js
const axios = require('axios');
// replace the value below with the Telegram token you receive from @BotFather
const token = '[YOUR_TOKEN]';
const chatId ='[YOUR_CHAT_ID]';
const url = `https://api.telegram.org/bot${token}/sendMessage`;
function sendMessage(msg) {
return axios.post(url, {
chat_id: chatId,
text: msg,
});
}
exports.trigger = (req, res) => {
const incident = req.body.incident;
const policy = incident.policy_name;
const cond = incident.condition_name;
const state = incident.state;
const url = incident.url;
const msg = `${policy} ${cond} is ${state}, please check ${url}`
console.log(msg);
sendMessage(msg)
.then(function (response) {
console.error('invoke telegram');
res.send({ status: 'OK'});
})
.catch(function (error) {
console.error(error);
res.sendStatus(500);
});
};
執行 npm init , 全都按照預設值
# npm init
This utility will walk you through creating a package.json file.
It only covers the most common items, and tries to guess sensible defaults.
See `npm help json` for definitive documentation on these fields
and exactly what they do.
Use `npm install <pkg>` afterwards to install a package and
save it as a dependency in the package.json file.
Press ^C at any time to quit.
package name: (telegram)
version: (1.0.0)
description:
entry point: (index.js)
test command:
git repository:
keywords:
author:
license: (ISC)
About to write to /telegram/package.json:
{
"name": "telegram",
"version": "1.0.0",
"description": "",
"main": "index.js",
"scripts": {
"test": "echo \"Error: no test specified\" && exit 1"
},
"author": "",
"license": "ISC"
}
Is this OK? (yes) Y
安裝 axios
# npm install axios
npm notice created a lockfile as package-lock.json. You should commit this file.
npm WARN telegram@1.0.0 No description
npm WARN telegram@1.0.0 No repository field.
+ axios@0.19.0
added 5 packages from 8 contributors and audited 5 packages in 2.123s
found 0 vulnerabilities
觀察相關資訊
# ls
index.js node_modules package-lock.json package.json
# cat package.json
{
"name": "telegram",
"version": "1.0.0",
"description": "",
"main": "index.js",
"scripts": {
"test": "echo \"Error: no test specified\" && exit 1"
},
"author": "",
"license": "ISC",
"dependencies": {
"axios": "^0.19.0"
}
}
佈署 cloud function ( 因為是用 container with cloud tools 環境, 所以有 gcloud 指令可以用 )
# gcloud functions deploy trigger --runtime nodejs8 --trigger-http --region asia-east2 --project YOUR_PROJECT_ID
- trigger 是名稱
- region 的部分, asia-east 只有 asia-east2
- Project 後面請用自己的 project ID
輸出的訊息中會有 httpsTrigger URL , 等等會拿來使用
url: https://asia-east2-YOUR_PROJECT.cloudfunctions.net/trigger
另外還有一段警告訊息
WARNING: Function created with limited-access IAM policy. To enable unauthorized access consider "gcloud alpha functions add-iam-policy-binding trigger --region=asia-east2 --member=allUsers --role=roles/cloudfunctions.invoker"
接下來建立 Stackdriver Webhook
點選專案內的選單 STACKDRIVER -- > Monitoring

在 Stackdriver 頁面
點選專案的下拉式選單 -- > 點選 Workspace Settings

點選 Notifications -- > 點選 WEBHOOKS -- > 點選 Add Webhook

填入 httpsTrigger URL
填入 Webhook name

這個時候如果點選 Test Connection , 但是 Telegram bot 沒有傳送訊息
那就要回到 Container 內下剛剛被提示的指令
# gcloud alpha functions add-iam-policy-binding trigger --region=asia-east2 --member=allUsers --role=roles/cloudfunctions.invoker
再次在 Webhook 頁面點選 Test Connection
會看到 undefind 訊息這樣就算是成功了

接下來就是可以針對 Stackdriver 的 alert 增加 telegram ( 使用 web hook 方式 )通知
- Alert Policy 建立可以參考之前的文章 http://sakananote2.blogspot.com/2019/11/stackdriver-gce-cpu.html
選一個要加入的 Alert policy , 點選選單內的 Edit

在 Notification 的地方
請將下拉式選單拉到底 ~~ 才會看到 Webhook with Token Authentication

選取 剛剛建立的 Webhook 點選 Add Notification Channel

記得點選 Save 存檔

測試方式, 我的警示條件是 CPU 大於一定百分比就發出警告
- 登入該台 VM, 使用 # stress-ng -c 4 --cpu-method all 進行壓測
接下來就會觀察到 telegram bot 送來相關訊息

Future work
- Bot 的管控
- Cloud function with iam policy binding
這樣也算是向 Cloud function 前進一步了 :)
~ enjoy it
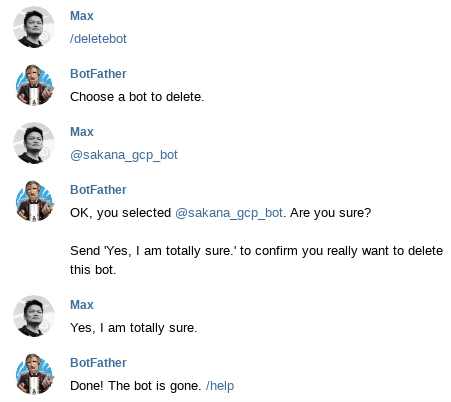
Notes: 刪除 telegram bot 方式

Reference
- 感謝 ikala Ken 與 ikala Lee Wei 提供相關資訊