OS: container with openSUSE Leap 15.4
Todo
升級 3 大平台工具 container
嘗試使用 terraform
今天來測試 Anthos cluster on Azure
首先參考官方文件
確認滿足相關準備工作
==== Google Cloud CLI ====
檢查 CLI 版本是否有高於 402
# gcloud version
Google Cloud SDK 412.0.0
bq 2.0.83
bundled-python3-unix 3.9.12
core 2022.12.09
gcloud-crc32c 1.0.0
gke-gcloud-auth-plugin 0.4.0
gsutil 5.17
kubectl 1.23.14
安裝 kubectl
# gcloud components install kubectl
驗證是否安裝 kubectl
# kubectl version
確認有相關身份驗證
這邊可以使用以下指令確認有沒有身份認証
# gcloud auth list
如果沒有的話, 請執行以下指令進行驗證
# gcloud auth login
啟用相關 API
啟用之前可以先到專案觀察相關 API
登入 GCP console
點選 選單 -- > APIs & Services
觀察 Enabled APIs 的數量
觀察相關 Library
點選 選單 -- > APIs & Services -- > Library
嘗試搜尋 gke 這個關鍵字


接下來使用官方提供的指令進行啟用 API
# gcloud services enable gkemulticloud.googleapis.com --project YOUR_PROJECT
# gcloud services enable gkeconnect.googleapis.com --project YOUR_PROJECT
# gcloud services enable connectgateway.googleapis.com --project YOUR_PROJECT
# gcloud services enable cloudresourcemanager.googleapis.com --project YOUR_PROJECT
# gcloud services enable anthos.googleapis.com --project YOUR_PROJECT
# gcloud services enable logging.googleapis.com --project YOUR_PROJECT
# gcloud services enable monitoring.googleapis.com --project YOUR_PROJECT
啟用之後就會發現 Enabled APIs 的數量增加了
==== Azure CLI ====
因為現在容器那邊的 az cli 有些問題, 這個部份我是用我實體機器的 az cli, 可以參考我之前的文章安裝 Azure cli
確認有安裝 Azure CLI
> az version
{
"azure-cli": "2.38.0",
"azure-cli-core": "2.38.0",
"azure-cli-telemetry": "1.0.6",
"extensions": {
"resource-graph": "1.0.0"
}
}
透過 # az account show 確認是否有身份驗證
如果還沒有身份驗證, 使用下列指令登入
# az login
==== 配置 Azure 虛擬網路 / 創建 Azure 資源組 ====
準備工作的 創建 Azure 資源組 ( Resource Group ) 與 創建虛擬網路 可以一起執行
建立新的 Resource Group
> az group create --name "anthos_test_2023" --location "japaneast"
建立新的虛擬網路
> az network vnet create \
--name "anthostest-vnet" \
--location "japaneast" \
--resource-group "anthos_test_2023" \
--address-prefixes 10.0.0.0/16 \
--subnet-name default
虛擬網路的名稱可以自訂, 這邊以 anthostest-vnet 為例
location 與 resource group 請與上面相同
子網路名稱可以自訂, IP 地址的前綴也可以自訂, 這邊以 10.0.0.0/16 為例, 會建立 anthostest-vnet 的虛擬網路 位址空間 10.0.0.0/16, 子網路為 default, 位址空間為 10.0.0.0/24
網路的前綴, 建議也參考 Google 另外一份文件, 建立 Cluster 選擇 CIDR 的說明
> az network public-ip create \
--name "anthos-nat-gw-ip" \
--location "japaneast" \
--resource-group "anthos_test_2023" \
--allocation-method Static \
--sku Standard
> az network nat gateway create \
--name "anthos-nat-gw" \
--location "japaneast" \
--resource-group "anthos_test_2023" \
--public-ip-addresses "anthos-nat-gw-ip" \
--idle-timeout 10
> az network vnet subnet update \
--name default \
--vnet-name "anthostest-vnet" \
--resource-group "anthos_test_2023" \
--nat-gateway "anthos-nat-gw"
Notes
==== 建立 Azure Active Directory 服務帳號 ====
建立應用程式註冊
> az ad app create --display-name anthos-test-20230126
建立完成之後可以到 Azure AAD 的 應用程式註冊 觀察

或是使用指令方式觀察
> az ad app list --output table
Console 上面的 應用程式(用戶端)識別碼, 或是 az 指令輸出的 AppId 就是文件上面的 APPLICATION_ID
也可以用指令撈出來
az ad app list --all \
--query "[?displayName=='anthos-test-20230126'].appId" \
--output tsv
建立服務主帳號
> az ad sp create --id "YOUR_APPLICATION_ID"
可以使用 az ad sp list 配合 --all 以及 --display-name 來確認是否建立成功
> az ad sp list --output table --all --display-name ant
DisplayName Id AppId CreatedDateTime
-------------------- ------------------------------------ ------------------------------------ --------------------
anthos-test-20230126 d8b67939-xxxx-4d49-xxxx-7d0f2e63xxxx 0656xxxx-f3f5-xxxx-8c13-f71ed3cxxxx7 2022-10-23T06:42:47Z
或是觀察 Console

==== 建立 Azure 角色分配 ====
要進行 Azure 角色分配 ( Role ), 需要下列資訊
APPLICATION_ID
SERVICE_PRINCIPAL_ID
剛剛建立的服務主帳號 id
這個部份官方文件應該有誤, 他的 query 方式是 "[?displayName=='APPLICATION_NAME'].{objectId:objectId}" , 事實上透過 > az ad sp list --all --query "[?displayName=='anthos-test-20230126']" 來看整個資料的輸出, 該欄位應該是 id , 而非 objectId
> az ad sp list --all --query "[?displayName=='anthos-test-20230126'].{objectId:id}" --output tsv 或是觀察 console 上面, 應用程式註冊內, 剛剛建立的 anthos-test-20230126 內容的本機目錄中的受控的應用程式 (SP) 裡面的 物件識別碼
SUBSCRIPTION_ID
這邊是以在訂閱這邊設定角色為例, 之前在測試 Azure Grafana 的時候, 也有相關指令可以參考
建立 3 個 role, Contributor、User Access Administrator 和 Key Vault Administrator 角色
建立指令如下
> az role assignment create \
--role "Contributor" \
--assignee "SERVICE_PRINCIPAL_ID" \
--scope "/subscriptions/SUBSCRIPTION_ID"
> az role assignment create \
--role "User Access Administrator" \
--assignee "SERVICE_PRINCIPAL_ID" \
--scope "/subscriptions/SUBSCRIPTION_ID"
> az role assignment create \
--role "Key Vault Administrator" \
--assignee "SERVICE_PRINCIPAL_ID" \
--scope "/subscriptions/SUBSCRIPTION_ID"
建立完成, 可以到 Console 上面
到該訂用帳戶 -- > 存取控制 ( IAM ) -- > 角色指派 上面去觀察是否有該 SP
==== 建立 客戶端證書 ====
要建立 Azure Client 需要下列資訊
SUBSCRIPTION_ID
APPLICATION_ID
TENANT_ID
建立 AzureClient
# gcloud container azure clients create anthos-azure-japaneast --location=asia-northeast2 --tenant-id="YOUR_TENANT_ID" --application-id="YOUR_APPLICATION_ID" --project YOUR_PROJECT
觀察是否有建立
# gcloud container azure clients list --location asia-northeast2 --project YOUR_PROJECT
如果要刪除可以用以下指令
接下來要將憑證上傳到 Azure AD 剛剛註冊的應用程式
因為是憑證的關係, 所以真的會利用變數來傳入了 :)
> CERT=$(gcloud container azure clients get-public-cert --location=asia-northeast2 anthos-azure-japaneast --project YOUR_PROJECT )
觀察輸出
> echo $CERT
> az ad app credential reset --id "YOUR_APPLICATION_ID" --cert "${CERT}" --append
上傳完成, 可以到 Azure Console 該應用程式的 憑證及祕密的 憑證觀察

==== 建立 SSH 金鑰對 ====
使用 ssh-keygen 指令建立金鑰
> ssh-keygen -m PEM -t rsa -b 4096 -f ~/.ssh/anthos-multicloud-key -N ""
==== 建立 Cluster ====
建立 cluster 參考
查詢 Resource Group ID
> az group show --output tsv --query id --resource-group anthos_test_2023
設定變數
> CLUSTER_RESOURCE_GROUP_ID=$(az group show --output tsv --query id --resource-group anthos_test_2023)
確認資訊
> echo $CLUSTER_RESOURCE_GROUP_ID
設定變數
> VNET_ID=$(az network vnet show --output tsv --resource-group anthos_test_2023 --query id --name anthostest-vnet)
確認資訊
> echo $VNET_ID
> SUBNET_ID=$(az network vnet subnet show --query id --output tsv \
--resource-group anthos_test_2023 \
--vnet-name anthostest-vnet \
--name default)
確認資訊
> echo $SUBNET_ID
設定變數
> AZURE_REGION=japaneast
確認資訊
> echo $AZURE_REGION
設定變數
> FLEET_PROJECT_ID=YOU_PROJECT
> CLIENT_NAME=anthos-azure-japaneast
> SSH_PUBLIC_KEY=$(cat ~/.ssh/anthos-multicloud-key.pub)
gcloud container azure clusters create azure-cluster-0 \
--location asia-northeast2 \
--cluster-version 1.24.5-gke.200 \
--azure-region japaneast \
--fleet-project YOU_PROJECT \
--client anthos-azure-japaneast \
--resource-group-id $CLUSTER_RESOURCE_GROUP_ID \
--vnet-id $VNET_ID \
--subnet-id $SUBNET_ID \
--pod-address-cidr-blocks 10.2.0.0/18 \
--service-address-cidr-blocks 10.1.0.0/24 \
--ssh-public-key "$SSH_PUBLIC_KEY" \
--vm-size Standard_B2ms \
--tags "google:gkemulticloud:cluster=azure-cluster-0" --project YOU_PROJECT
fleet-project 請對應到自己的 project ID
建議可以先用 > az vm list-skus -l japaneast -r virtualMachines -o table 確認有該機器可用, 不然可能會遇到資源不足 error
沒有使用 NAT Gateway 換了 pod 與 service address CIDR 還是失敗, 但是訊息變成 Operation failed, 卡在 Health Check
之前有規範 Pod 使用 100.65.0.0/16 , Service 使用 100.66.0.0/16 失敗, 之後再來測試
列出 Cluster 資訊
> gcloud container azure clusters list --location asia-northeast2 --project YOU_PROJECT
如果要刪除 Cluster 可以用下列指令
> gcloud container azure clusters delete azure-cluster-0 --location asia-northeast2 --project YOU_PROJECT
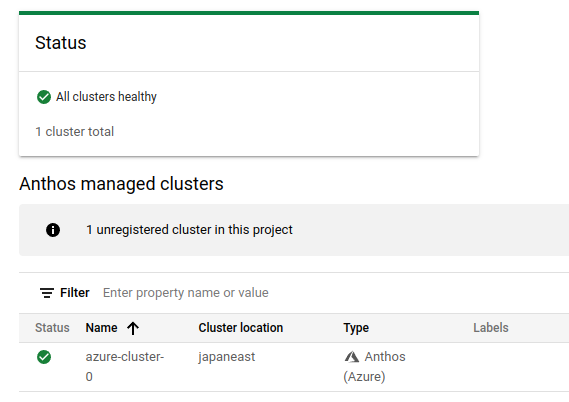
可以到 GCP Anthos 的 Cluster 觀察資訊

建立 Node Pool ( 使用 VMSS )
> gcloud container azure node-pools create pool-0 \
--cluster azure-cluster-0 \
--location asia-northeast2 \
--node-version 1.24.5-gke.200 \
--vm-size Standard_B2s \
--max-pods-per-node 110 \
--min-nodes 1 \
--max-nodes 5 \
--ssh-public-key "$SSH_PUBLIC_KEY" \
--subnet-id $SUBNET_ID \
--tags "google:gkemulticloud:cluster=azure-cluster-0" --project YOU_PROJECT
觀察 Azure VMSS 建立完成

GCP 上面的 Anthos Cluster 狀態改為 login

觀察相關資訊
gcloud container azure node-pools list --location asia-northeast2 --cluster azure-cluster-0 --project YOU_PROJECT
gcloud container azure node-pools describe pool-0 \
--cluster azure-cluster-0 \
--location asia-northeast2 --project YOU_PROJECT
點選 azure-cluster-0 Status 的圖示
點選 LOG IN

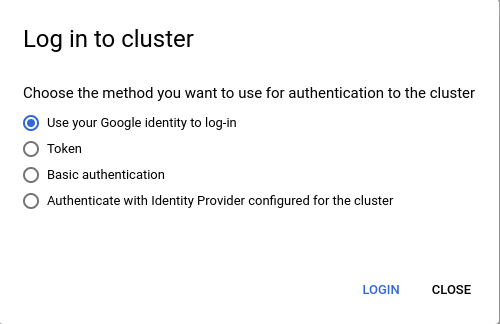
選取登入的方式
點選 Use your Google identity to log-in
點選 LOGIN
這個時候就發現 Status 就正常了
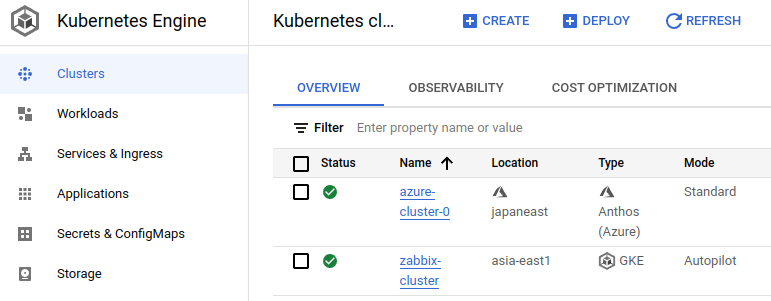
同時這個 Cluster 也會出現在 GKE 的 Cluster 列表內
接下來就是取得 authentication credentials
> gcloud container azure clusters get-credentials azure-cluster-0 --location asia-northeast2 --project YOU_PROJECT
相關的 credentials 會被整合到目前的 ~/.kube/config
下個簡單的指令來驗證
> kubectl get nodes
NAME STATUS ROLES AGE VERSION
gke-fnahzzytjbfa-np-tjd6ttygv5da-vmss000000 Ready <none> 18d v1.24.5-gke.200
建立一個 deployment 測試
> kubectl create deployment hello-server --image=us-docker.pkg.dev/google-samples/containers/gke/hello-app:1.0
> kubectl get deployments
NAME READY UP-TO-DATE AVAILABLE AGE
hello-server 1/1 1 1 71s
將剛剛的 deployment export 出去
> kubectl expose deployment hello-server --type LoadBalancer --port 80 --target-port 8080
service/hello-server exposed
確認資訊
> kubectl get services
NAME TYPE CLUSTER-IP EXTERNAL-IP PORT(S) AGE
hello-server LoadBalancer 10.1.0.54 YOUR_PUBLIC_IP 80:30898/TCP 95s
kubernetes ClusterIP 10.1.0.1 <none> 443/TCP 18d
開啟瀏覽器測試 http://YOUR_PUBLIC_IP

可以在 GCP console 上面觀察 Service

我們剛剛 export 出去的 Service Type 是 LoadBalancer, 所以其實連結的是 Azure 那邊的負載平衡器, 如果在 GCP 這邊是看不到的
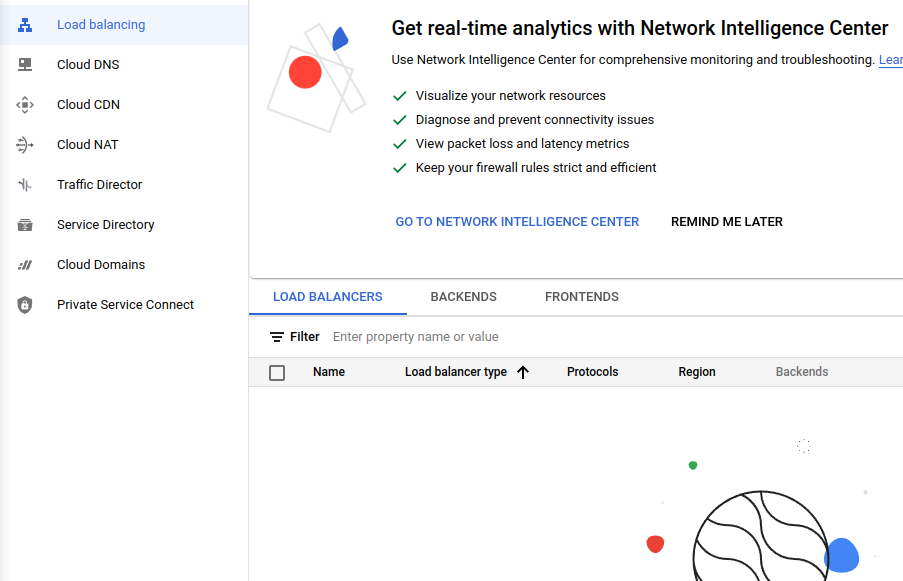
而是對應到 Azure 的 負載平衡器

又朝 Kubernetes 更進一步
~ enjoy it
補充: 刪除相關資源
> gcloud container azure node-pools delete pool-0 --cluster azure-cluster-0 --location asia-northeast2 --project YOU_PROJECT
> gcloud container azure clusters delete azure-cluster-0 --location asia-northeast2 --project YOU_PROJECT
刪除順序要反過來
> az network vnet subnet update \
--name default \
--vnet-name "anthostest-vnet" \
--resource-group "anthos_test_2023" \
--nat-gateway ""
> az network nat gateway delete \
--name "anthos-nat-gw" \
--resource-group "anthos_test_2023"
> az network public-ip delete \
--name "anthos-nat-gw-ip" \
--resource-group "anthos_test_2023"
這樣才算是清除乾淨 :)
Reference
Todo