SendGrid with CentOS 8.2 in GCP 發送郵件小記
上次有寫在 Azure 利用 SendGrid 寄信
今天來寫在 GCP 利用 SendGrid 寄信
OS: CentOS 8.2 in GCP
登入 GCP console
==== SendGrid 部分 ====
啟用 SendGrid Email API
點選 START WITH THE FREE PLAN

選取 Plan: 這邊我是用 Free
勾選 By checking this box, ...
點選 Subscribe

要進行這個動作, 要對 Billing account 有管理的權限
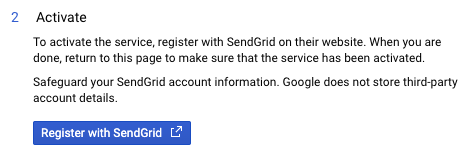
接下來要註冊 SendGrid
點選 Register with SendGrid
輸入相關資訊
勾選 I accept ...
點選‘ Continue

這樣帳號就建立完成, SendGrid 寄送郵件需要進行驗證後才能寄送
相關資訊在 https://sendgrid.com/docs/for-developers/sending-email/sender-identity/ , 有兩種驗證方式
Single Sender Verification
https://sendgrid.com/docs/ui/sending-email/sender-verification/
最簡單快速的方式, 但是只有驗證過的 email 才能寄送
Domain authentication

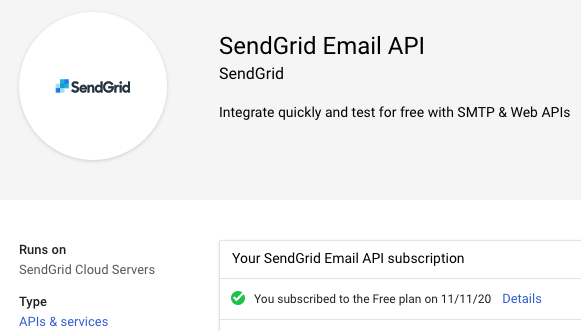
SendGrid API 的訂閱是以同一個 Billing account 為基準
也就是只要是同一個 Billing account, 底下的 project 都可以使用
相關畫面可以觀察 SendGrid Email API 畫面
接下來處理驗證的部分
登入 SendGrid 的網站
輸入剛剛建立的 Username 與 密碼
點選 Login

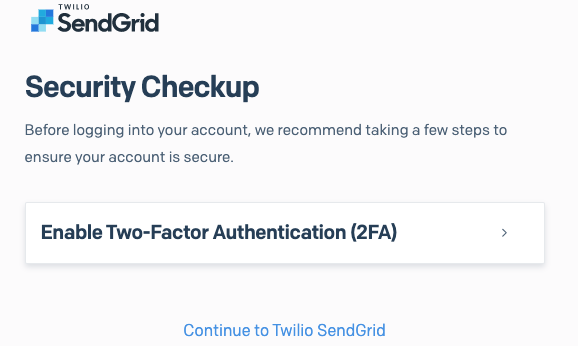
首次登入可能會被詢問是否要啟用 Two-Factor Authentication ( 2FA )
目前暫不啟用, 點選 Continue to Twilio SendGrid
輸入相關資訊
點選 Get Started!

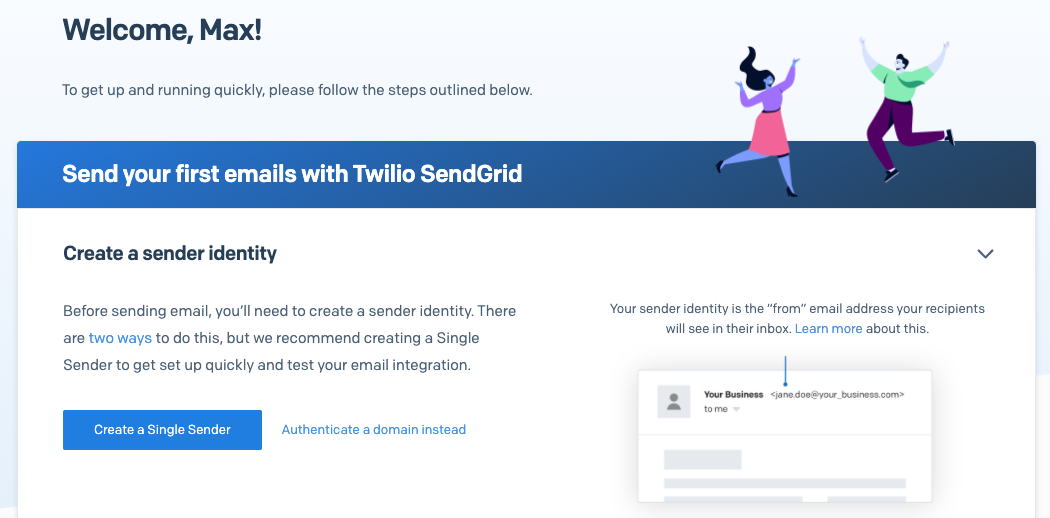
歡迎畫面中有建立 Idenity 畫面
點選 Create a Single Sender
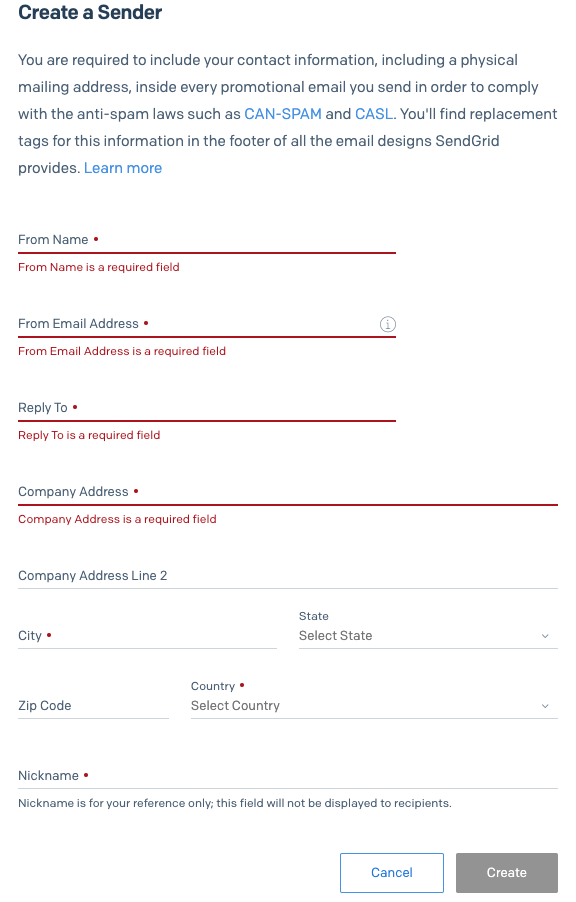
這個時候會被帶到 Create a Sender 畫面
也可以使用 Setting -- > Sender Authentication
輸入相關資訊
點選 Create
建立完成
觀察相關資訊, 還沒驗證 email 的時候, VERIFIED 欄位是 X

到 email 收件夾收信
點選 Verify Single Sender
會被導向回 SendGrid 網站, 登入後就會看到 Sender Verified 訊息

再次觀察, 已經變成已驗證

接下來建立 SendGrid API Key, 可以參考之前的筆記
==== Postfix 部分 ====
在 GCP 建立 GCE ( OS: CentOS 8.2 )
參考官方文件
登入 SSH, 切換到 root
設定 umask
# umask
安裝套件
#yum install postfix cyrus-sasl-plain cyrus-sasl-md5 -y
修改 main.cf
# vi /etc/postfix/main.cf
註解原有的 smtp_tls_security_level
# smtp_tls_security_level = may
加入下列內容
relayhost = [smtp.sendgrid.net]:2525
smtp_tls_security_level = encrypt
smtp_sasl_auth_enable = yes
smtp_sasl_password_maps = hash:/etc/postfix/sasl_passwd
header_size_limit = 4096000
smtp_sasl_security_options = noanonymous
default_transport 與 relay_transport 預設不存在, 不需要註解
建立 sasl_passwd
# echo [smtp.sendgrid.net]:2525 apikey:your-api-key >> /etc/postfix/sasl_passwd
your-api-key 填入 SendGrid API Key
建立 sasl_passwd.db
# postmap /etc/postfix/sasl_passwd
觀察相關資訊
# ls -l /etc/postfix/sasl_passwd*
-rw-------. 1 root root 102 Nov 11 13:50 /etc/postfix/sasl_passwd
-rw-------. 1 root root 12288 Nov 11 13:50 /etc/postfix/sasl_passwd.db
移除 sasl_passwd
# rm /etc/postfix/sasl_passwd
設定 sasl_passwd.db 權限
# chmod 600 /etc/postfix/sasl_passwd.db
檢查 postfix 服務
# systemctl status postfix
啟動服務
# systemctl start postfix
檢查 postfix 服務
# systemctl status postfix
設定開機啟動
# systemctl enable postfix
文件內服務是用 postfix 指令啟動, 但是我測試是用 systemctl 啟動
測試寄信
安裝 mailx 套件
# yum install mailx -y
# echo 'test202011112207' | mail -s test202011112207 -r ACCOUNT@YOUR.com.tw sakana@study-area.org
-r 是指定 from ( 寄件人 ), 後面的 email 要符合 SendGrid 上面已經驗證的電子郵件, 否則無法寄出, 然後會收到下列錯誤訊息
status=bounced (host smtp.sendgrid.net[161.202.148.179] said: 550 The from address does not match a verified Sender Identity. Mail cannot be sent until this error is resolved.
sakana@study-area.org 是收件人, 請換成要收件的測試 email 收件人
觀察相關資訊
# tail -n 10 /var/log/maillog
或是確認收件人有沒有收到相關信件
這樣就大功告成, 又向 GCP 錢進一步
~ enjoy it
Reference:
https://cloud.google.com/compute/docs/tutorials/sending-mail/using-sendgrid
http://sakananote2.blogspot.com/2020/01/sendgrid-in-azure.html
1 則留言:
Looking for a SendGrid alternative? PhotonConsole offers reliable transactional email delivery, SMTP relay, advanced analytics, and scalable API solutions for businesses seeking better inbox placement, cost efficiency, and simplified email infrastructure without compromising performance.
張貼留言