Zabbix Proxy with container 與透過 zabbix proxy 自動註冊 小記
Zabbix: zabbix-proxy-sqlite3 with container
OS: openSUSE Leap 15.3 in Azure
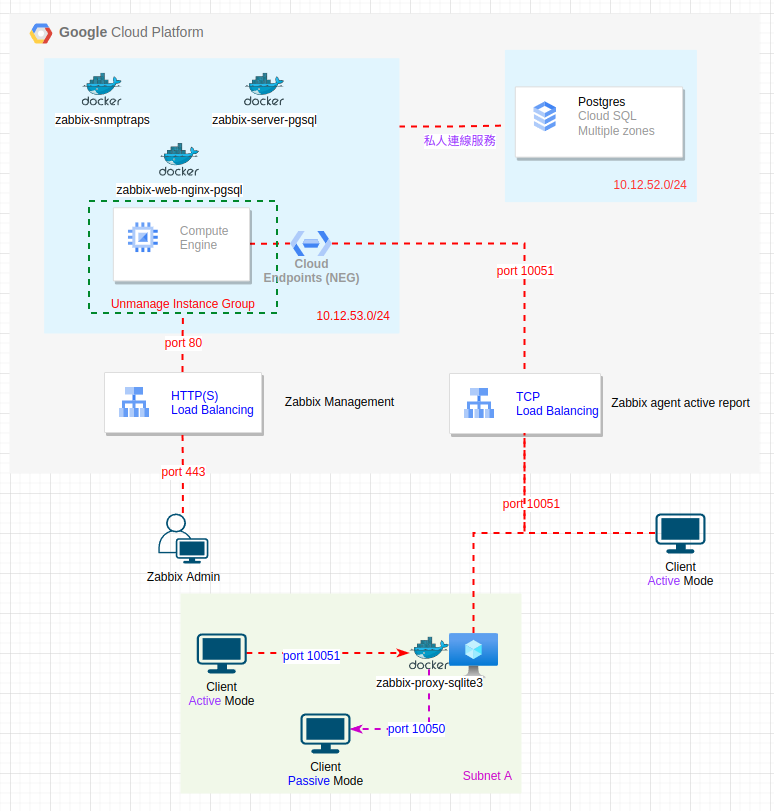
今天來寫 Zabbix Proxy with container 安裝以及 zabbix agent 如何透過 zabbix proxy 來進行自動註冊
先來說明為何需要 Zabbix Proxy 來提供服務, 目前規劃的想法如下
Zabbix Client 沒有對外公共 IP, 無法傳送資料給 Server, 所以在內網將相關資訊匯報給 Zabbix Proxy, 再由 Zabbix Proxy 傳送資訊
Zabbix Proxy 如果在網路不穩定的狀況下, Client 的相關資料是存放在 DB 內, 等到網路恢復穩定的時候, 可以將相關資料傳回 Zabbix Server
目前並不是所有的 Template 都有 Active, 可以透過 Zabbix Proxy 對內網的 Zabbix passive client 收集資料後送出
這次的測試 Zabbix Proxy 我是建立在 Azure
在 Azure 建立 openSUSE Leap 15.3 VM
登入 openSUSE Leap 15.3
我們 Zabbix Proxy 的安裝是使用 container 的方式
啟動 docker 服務, 設定開機啟動
# systemctl start docker
# systemctl enable docker
啟動 zabbix proxy
# docker run --name zabbix-proxy-sqlite3 \
-e ZBX_HOSTNAME="Azure-sakana-proxy" \
-e ZBX_SERVER_HOST="YOUR_ZABBIX_SERVER_IP" \
-e ZBX_TIMEOUT="30" \
-e ZBX_CONFIGFREQUENCY="60" \
-e ZBX_DATASENDERFREQUENCY=3 \
-p 10051:10051 \
-d zabbix/zabbix-proxy-sqlite3:alpine-6.0-latest
然後我有新增自動註冊機制以及安裝 zabbix agent
新增 Proxy in Zabbix
登入 Zabbix 管理介面
點選 Administration -- > Proxies

點選右上角 Create proxy
輸入名稱
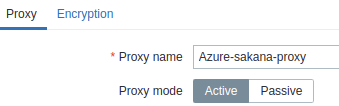
點選 Add 加入 Proxy
可以到 Administration -- > Proxies
看看新增加的 Last seen (age) 有沒有秒數

接下來處理 Client 透過 Proxy 加入的自動註冊
點選 Configuration -- > Actions -- > Autoregistration actions
點選右上角的 Create action

輸入 名稱

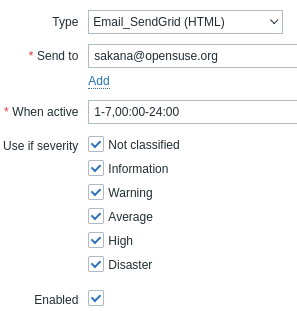
點選 Add
Type: 選取 Proxy
Operator: Contains
Proxy: 輸入或是選取剛剛建的 Proxy
點選 Add
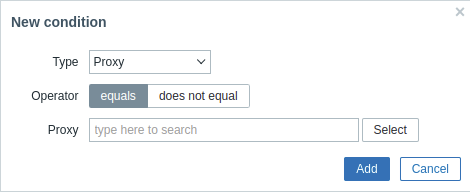
接下來設定自動註冊要套用的行為
點選 Operations

點選 Add 完設定
最後我們要來驗證, Zabbix agent 透過 Zabbix Proxy 來進行資訊的回報
一樣在 Azure 上面建立 openSUSE Leap 15.3 VM
登入 openSUSE Leap 15.3
安裝 zabbix agent2
# rpm -Uvh --nosignature https://repo.zabbix.com/zabbix/6.0/sles/15/x86_64/zabbix-release-6.0-1.sles15.noarch.rpm
# zypper --gpg-auto-import-keys refresh 'Zabbix Official Repository'
# zypper install zabbix-agent2
修改相關設定
觀察設定檔
# egrep -v '^#|^$' /etc/zabbix/zabbix_agent2.conf
PidFile=/var/run/zabbix/zabbix_agent2.pid
LogFile=/var/log/zabbix/zabbix_agent2.log
LogFileSize=0
Server=172.16.0.5
ServerActive=172.16.0.5
#Hostname=zabbix server
HostnameItem=system.hostname
Include=/etc/zabbix/zabbix_agent2.d/*.conf
ControlSocket=/tmp/agent.sock
Include=./zabbix_agent2.d/plugins.d/*.conf
啟動 zabbix agent 2 的服務, 並設定開機啟動
# systemctl start zabbix-agent2
# systemctl status zabbix-agent2
# systemctl enable zabbix-agent2
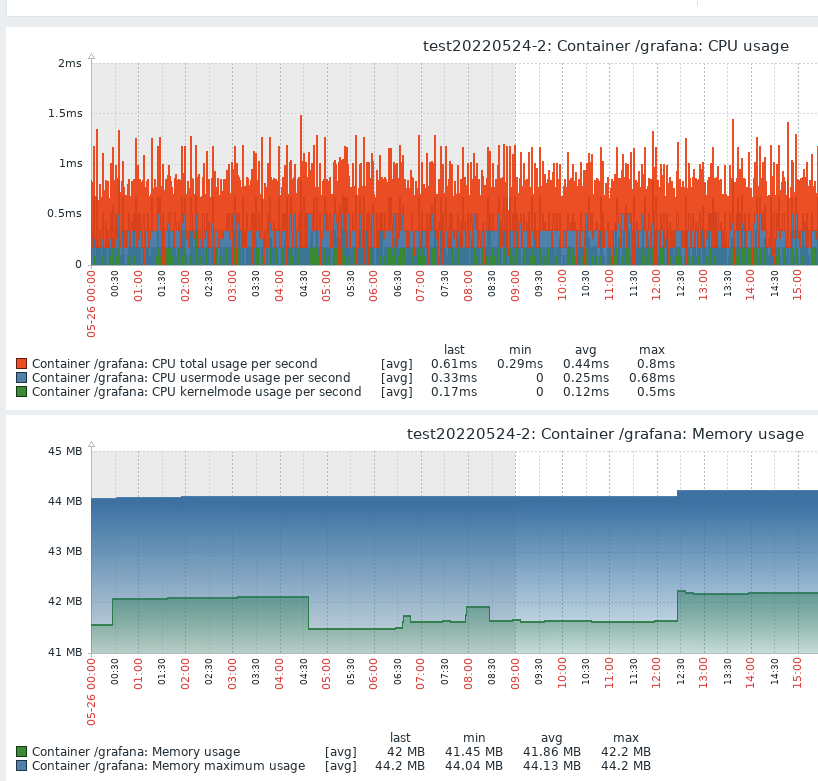
另外同場加映, 因為有測試 Docker by Zabbix agent 2 這個 template, 額外進行下列動作
# systemctl start docker
# systemctl enable docker
# usermod -aG docker zabbix
測試是否可以監控 docker
# docker run -d --name=grafana -p 3000:3000 grafana/grafana-enterprise
實驗結果成功
又往 Zabbix 前進一步
~ enjoy it
References: