星期日, 8月 02, 2020

三大雲平台工具容器升級小記 - 使用 openSUSE Leap 15.2 Container

三大雲平台工具容器升級小記 - 使用 openSUSE Leap 15.2 Container


OS: container with openSUSE Leap 15.2


上次升級是 2020/5/31 , 這次會來升級的原因是 

  • 使用 openSUSE Leap 15.2

  • 升級 gcloud 版本

  • 升級 azure-cli 版本

  • 升級 aws cli 版本


先整理結果


升級前

OS: openSUSE Leap 15.1

awscli:  aws-cli/2.0.17 Python/3.7.3

gcloud: Google Cloud SDK 290.0.1

azure-cli: 2.6.0


升級後

OS: openSUSE Leap 15.2

awscli:  aws-cli/2.0.36 Python/3.7.3

gcloud: Google Cloud SDK 303.0.0

azure-cli: 2.9.1


AWS CLI v2 安裝文件


GCP Cloud SDK 版本


這次的做法還是會透過 docker build 指令來進行

  • 我有比較過 docker build 以及使用現有的 docker image 修改後再使用 docker commit 建立的 image 大小還是很有差異的


Dockerfile 的部分我是拿之前 openSUSE Leap 15.1 來修改


修改細節

  • Update time

  • 使用 openSUSE Leap 15.2

  • 修改 pip3 安裝 boto 而非 boto3

  • Google SDK 版本還有下載的檔案路徑以及檔案名稱


列出 diff 的結果給大家參考


> diff opensuseLeap152_ansible_20200802_Dockerfile  opensuseLeap151_ansible_20200531_Dockerfile 


1,2c1,2

< # openSUSE Leap 15.2 with ansible, azure-cli, aws cli, gcloud

< FROM opensuse/leap:15.2

---

> # openSUSE Leap 15.1 with ansible, azure-cli

> FROM opensuse/leap:15.1

6c6

< # update: 20200802

---

> # update: 20200509

12c12

< # Install python3-pip, upgrade pip, ansible[azure], boto

---

> # Install python3-pip, upgrade pip, ansible[azure], boto3

16c16

<   pip3 install boto

---

>   pip3 install boto3

64c64

< # Install google cloud SDK 303.0.0

---

> # Install google cloud SDK 290.0.1

66,67c66,67

< RUN wget https://dl.google.com/dl/cloudsdk/channels/rapid/downloads/google-cloud-sdk-303.0.0-linux-x86_64.tar.gz && \

<   tar zxvf google-cloud-sdk-303.0.0-linux-x86_64.tar.gz && \

---

> RUN wget https://dl.google.com/dl/cloudsdk/channels/rapid/downloads/google-cloud-sdk-290.0.1-linux-x86_64.tar.gz && \

>   tar zxvf google-cloud-sdk-290.0.1-linux-x86_64.tar.gz && \


Dockerfile 內容如下


# openSUSE Leap 15.2 with ansible, azure-cli, aws cli, gcloud

FROM opensuse/leap:15.2


# Author

# MAINTAINER 已經棄用, 之後要使用 LABEL 方式

# update: 20200802

LABEL maintainer="sakana@cycu.org.tw"


# Set LANG for UTF-8 - for Chinese

ENV LANG C.UTF-8


# Install python3-pip, upgrade pip, ansible[azure], boto

RUN zypper install -y python3-pip && \

  pip3 install --upgrade pip && \

  pip3 install ansible[azure] && \

  pip3 install boto


# Install openssh, set ls alias

RUN zypper install -y openssh

RUN echo "alias ls='ls --color=tty'" >> /root/.bashrc


# Install wget, download azure_rm.py, set permission

RUN zypper install -y wget


# azure_rm.py no need to download 

# Starting with Ansible 2.8, Ansible provides an Azure dynamic-inventory plug-in

# https://docs.ansible.com/ansible/latest/plugins/inventory/azure_rm.html

# old azure_rm.py URL https://raw.githubusercontent.com/ansible/ansible/devel/contrib/inventory/azure_rm.py


# Create working directory in /root

RUN mkdir /root/.azure && \

  mkdir /root/.aws && \

  mkdir /root/playbook && \

  mkdir -p /root/.config/gcloud && \

  wget https://raw.githubusercontent.com/sakanamax/LearnAnsible/master/template/ansible.cfg && \

  mv /ansible.cfg /root && \

  wget https://raw.githubusercontent.com/sakanamax/LearnAnsible/master/template/hosts && \

  mv /hosts /root


#### Azure #### 

# Install azure-cli

RUN zypper install -y curl && \

  rpm --import https://packages.microsoft.com/keys/microsoft.asc && \

  zypper addrepo --name 'Azure CLI' --check https://packages.microsoft.com/yumrepos/azure-cli azure-cli && \

  zypper install --from azure-cli -y azure-cli


#install vim tar gzip jq unzip less bind-utils iputils groff

RUN zypper install -y vim tar gzip jq unzip less bind-utils iputils groff

RUN echo "set encoding=utf8" > /root/.vimrc


#### AWS ####

# Install awscli v1

#RUN pip3 install awscli

#RUN echo "source /usr/bin/aws_bash_completer" >> /root/.bashrc


# Install awscli v2

RUN curl "https://awscli.amazonaws.com/awscli-exe-linux-x86_64.zip" -o "awscliv2.zip" && \

  unzip awscliv2.zip && \

  /aws/install

RUN echo "complete -C '/usr/local/bin/aws_completer' aws" >> /root/.bashrc


#### GCP ####

# Install google cloud SDK 303.0.0

ENV CLOUDSDK_CORE_DISABLE_PROMPTS 1

RUN wget https://dl.google.com/dl/cloudsdk/channels/rapid/downloads/google-cloud-sdk-303.0.0-linux-x86_64.tar.gz && \

  tar zxvf google-cloud-sdk-303.0.0-linux-x86_64.tar.gz && \

  /google-cloud-sdk/install.sh && \

  echo "if [ -f '/google-cloud-sdk/path.bash.inc' ]; then . '/google-cloud-sdk/path.bash.inc'; fi" >> /root/.bashrc && \

  echo "if [ -f '/google-cloud-sdk/completion.bash.inc' ]; then . '/google-cloud-sdk/completion.bash.inc'; fi" >> /root/.bashrc


使用 docker build 指令建立 image


> docker build  -t  sakana/ansible_opensuse152:20200802  -f  ./opensuseLeap152_ansible_20200802_Dockerfile   .


  • 使用 -f 指定 Dockerfile 名稱

  • 最後是 ” . “ 目前的目錄


測試 container image


> docker  run  -v  ~/.aws:/root/.aws  -v  ~/.azure:/root/.azure  -v ~/.config/gcloud:/root/.config/gcloud  -it  sakana/ansible_opensuse152:20200802  /bin/bash


測試結果 OK, 建立  tag


觀察資訊

> docker  images


REPOSITORY                   TAG                 IMAGE ID            CREATED              SIZE

sakana/ansible_opensuse152   20200802            d1bb9da2d2e1        14 seconds ago      1.66GB

opensuse/leap                15.2                b02baf32bb00        4 days ago          105MB

sakana/ansible_opensuse151   latest              0fcb15bb33a0        2 months ago        1.78GB


建立 tag 

> docker  tag  d1bb9da2d2e1  sakana/ansible_opensuse152:latest


登入 docker

> docker  login


上傳 image

> docker  push  sakana/ansible_opensuse152:20200802


> docker  push  sakana/ansible_opensuse152:latest


完工, 以後使用就用


> docker  run  -v  ~/.aws:/root/.aws  -v  ~/.azure:/root/.azure  -v ~/.config/gcloud:/root/.config/gcloud  -it  sakana/ansible_opensuse152  /bin/bash


~ enjoy it


Reference:

星期六, 8月 01, 2020

使用 AWS WAF v2 Web ACL 限制存取小記

使用 AWS WAF v2 Web ACL 限制存取小記


有時候在業務上會碰到一些超量存取的狀況, 

所以今天要來測試 AWS WAF v2 Web ACL 來限制存取


情境:

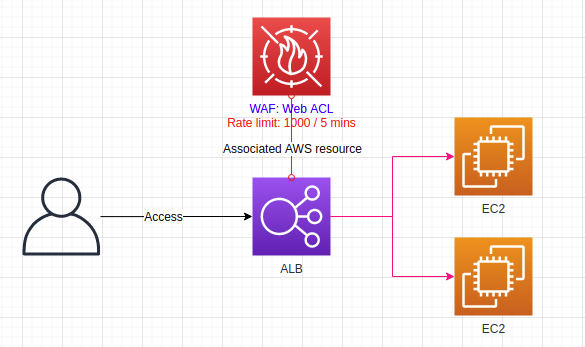
使用 AWS Web ACL 對 ALB 限制存取超過一定門檻的行為


建立 ELB 以及 EC2


參考之前的筆記來建立


這邊有變化的大概就是目前 openSUSE Leap 已經出道 15.2 

所以這次是使用 openSUSE Leap 15.2


查詢 image id 方式

  • # aws  ec2  describe-images --filters  "Name=name,Values=openSUSE-Leap-15.2*"


但是也是碰到找到的 image id 要先接受協議而無法非互動安裝

  •  所以最快的方式就是先用 console 裝一個然後看他的 image id :)


我是用 ansible playbook 的方式建立 2 台 EC2

  • 指派 default 與 ssh 的 security group


根據得到的 IP 進行連線測試


> ssh  -i  test-key.pem  ec2-user@18.223.195.175


連入 2 台 openSUSE Leap 15.2 安裝 apache 並啟動服務, 編輯基本網頁, 建立 port 80 的 security Group, 確認可以存取


使用參考筆記的指令

  • 建立 Load Balancer , 可以觀察 Type : application ( 所以是 ALB )

  • 建立 Target Group, 建立 listener , 讓 ALB 可以存取到後端的 2 台 openSUSE Leap


確認 ALB 可以順利存取後端的服務


好的, 現在終於要進入本番角色 WAF 了 :)


在 AWS console 搜尋 WAF 服務, 登入 WAF 主控台


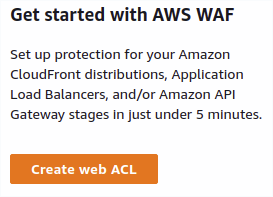
點選 Create web ACL


選取 Region

輸入 名稱

點選 Next


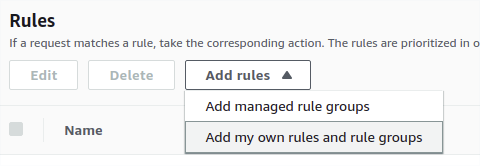
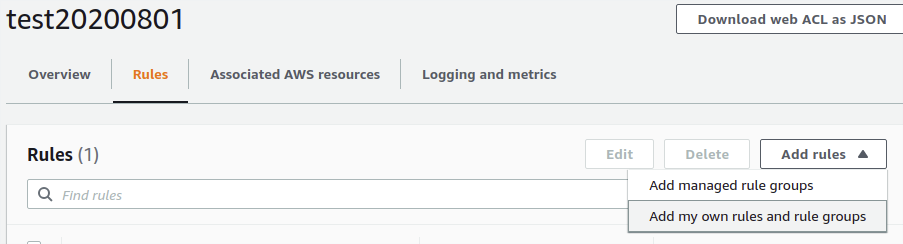
在 Rules: 點選 Add rules

點選 Add my own rules and rule groups


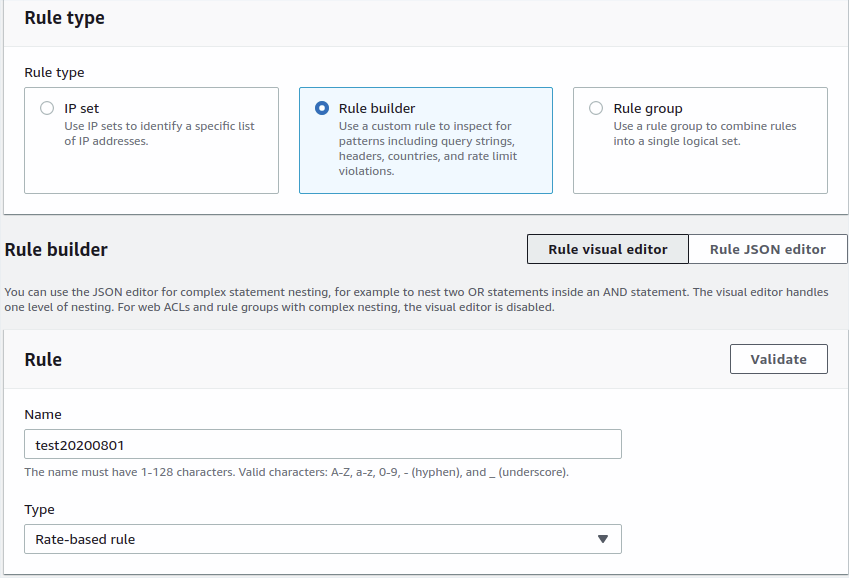
預設的 Rule type 爲 Rule builder

輸入 名稱

Type: 選取 Rate-based rule

Rate limit: 輸入要設定的門檻, 這邊輸入 1000 (1000 / 5 mins)

Action : Block

點選 Add rule 


確認規則建立

點選 Next


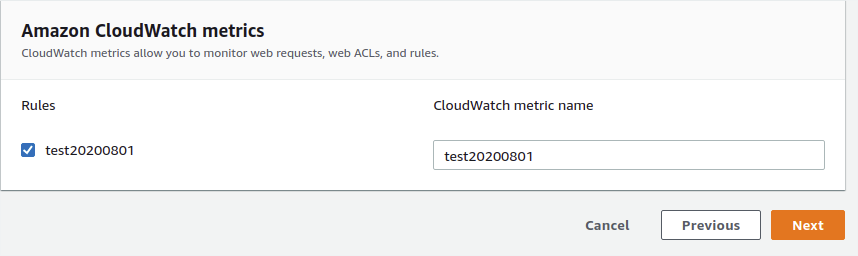
點選 Next ( 如果沒有調整 )


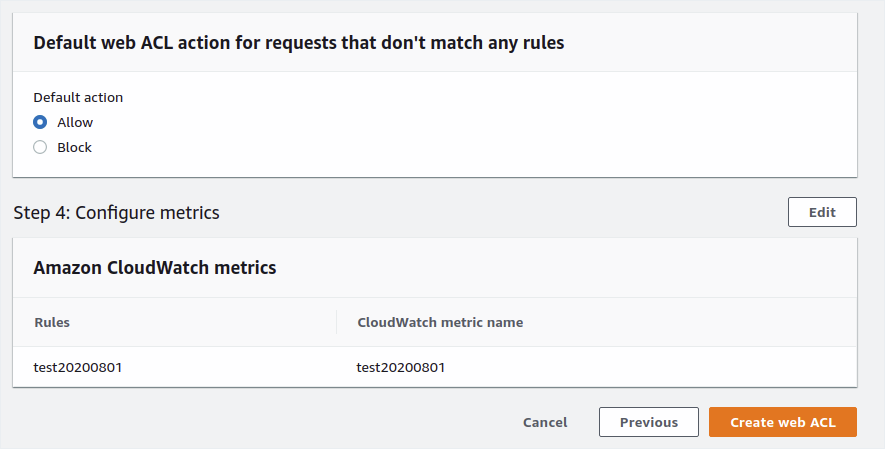
點選 Next


確認相關資訊

點選 Create web ACL


接下來要來套用 WAF 到剛剛建立的 LB

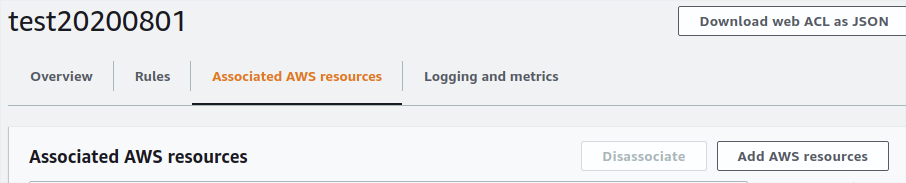
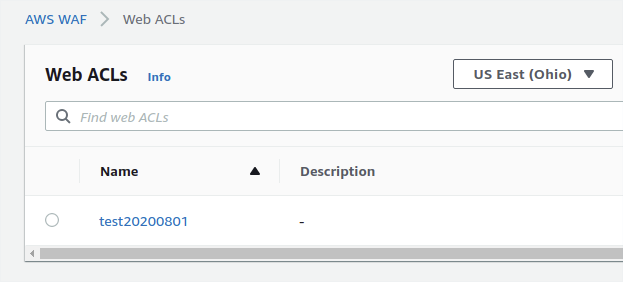
點選剛剛建立的 Web ACL


點選 Associated AWS resources

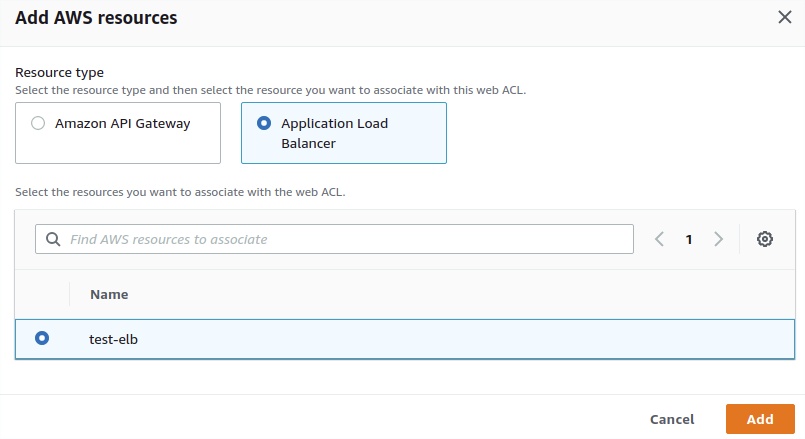
點選 Add AWS resources


點選 Resource type: Application Load Balancer

選取剛剛建立的 ELB

點選 Add


觀察資訊


這樣就建立完成


接下來進行驗證, 我在外部使用 ab 指令 來進行測試


確認 ab 版本


# ab  -V


This is ApacheBench, Version 2.3 <$Revision: 1826891 $>

Copyright 1996 Adam Twiss, Zeus Technology Ltd, http://www.zeustech.net/

Licensed to The Apache Software Foundation, http://www.apache.org/


使用 ab 指令 打LB 900次


# ab  -n  900  -c  1  http://test-elb-757822458.us-east-2.elb.amazonaws.com/index.html


This is ApacheBench, Version 2.3 <$Revision: 1826891 $>

Copyright 1996 Adam Twiss, Zeus Technology Ltd, http://www.zeustech.net/

Licensed to The Apache Software Foundation, http://www.apache.org/


Benchmarking test-elb-757822458.us-east-2.elb.amazonaws.com (be patient)

Completed 100 requests

Completed 200 requests

Completed 300 requests

Completed 400 requests

Completed 500 requests

Completed 600 requests

Completed 700 requests

Completed 800 requests

Completed 900 requests

Finished 900 requests


打完之後測試是否可以存取


# curl  http://test-elb-757822458.us-east-2.elb.amazonaws.com/index.html


<html>This is site 2 </html>


  • 因為沒有超過門檻 1000 / 5 mins 所以沒有問題


接下來打 1100 次


# ab -n 1100 -chttp://test-elb-757822458.us-east-2.elb.amazonaws.com/index.html


This is ApacheBench, Version 2.3 <$Revision: 1826891 $>

Copyright 1996 Adam Twiss, Zeus Technology Ltd, http://www.zeustech.net/

Licensed to The Apache Software Foundation, http://www.apache.org/


Benchmarking test-elb-757822458.us-east-2.elb.amazonaws.com (be patient)

Completed 110 requests

Completed 220 requests

Completed 330 requests

Completed 440 requests

Completed 550 requests

Completed 660 requests

Completed 770 requests

Completed 880 requests

Completed 990 requests

Completed 1100 requests

Finished 1100 requests


再次測試存取


# curl  http://test-elb-757822458.us-east-2.elb.amazonaws.com/index.html


<html>

<head><title>403 Forbidden</title></head>

<body bgcolor="white">

<center><h1>403 Forbidden</h1></center>

</body>

</html>


  • 這邊就會觀察到, 目前無法進行存取


同場加映: 使用 IP sets 建立白名單, 允許連線


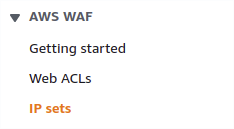
點選 WAF 控制台的 IP sets


點選 Create IP set


輸入名稱與 IP address

點選 Create IP set


點選剛剛建立的 Web ACL


點選 Rules

點選 Add rules

點選 Add my own rules and rule groups


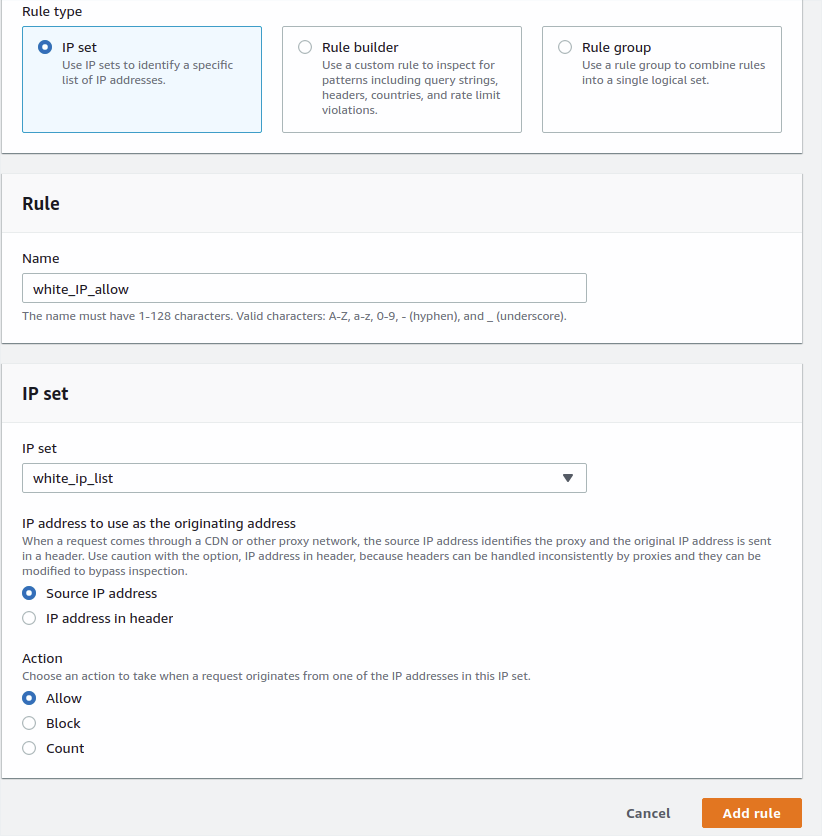
Rule type: 選取 IP set

輸入名稱

選取剛剛建立的 IP set

Action: 點選 Allow

點選 Add rule


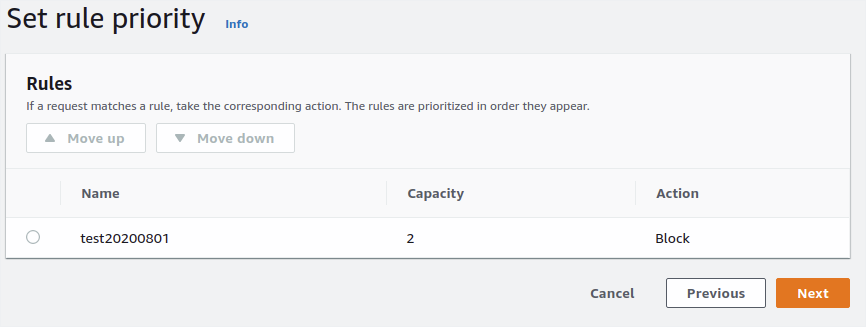
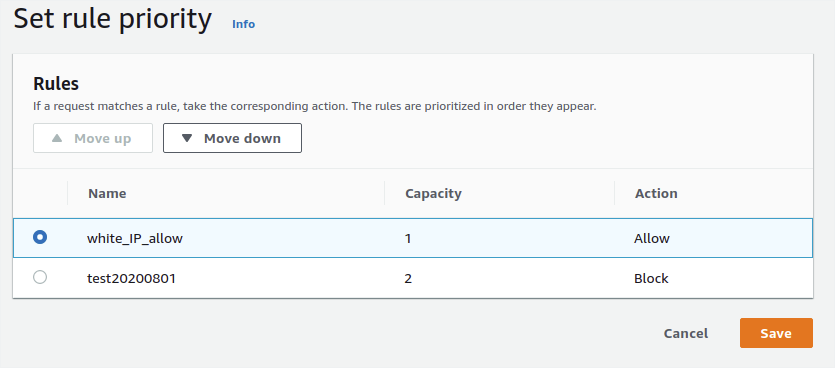
將 白名單的規則 priority 向上調整

點選 Save


再次以 ab 指令進行測試, 這次就會發現不會被 WAF 阻擋了


同場加映: 用 aws 指令列出 Web ACL 內容以及目前被阻擋的 IP


列出 WAF 在單一 region 的 web acl


# aws  wafv2  list-web-acls --scope  REGIONAL  --region  us-east-2  --profile  default


{

    "NextMarker": "test20200801",

    "WebACLs": [

        {

            "Name": "test20200801",

            "Id": "32f779c2-1c2b-4069-a625-b7d216802012",

            "Description": "",

            "LockToken": "34194f29-b629-4df3-b57c-f3d0f79e7619",

            "ARN": "arn:aws:wafv2:us-east-2:783127631924:regional/webacl/test20200801/35e779c2-1c2b-4089-a615-b7d217801012"

        }

    ]

}


  • 這邊主要需要的資訊是 Name 與 Id


列出該 Web ACL 相關資訊


# aws  wafv2  get-web-acl  --scope  REGIONAL --id  32f779c2-1c2b-4069-a625-b7d216802012 --name  test20200801 --region  us-east-2  --profile  default

{

    "WebACL": {

        "Name": "test20200801",

        "Id": "32f779c2-1c2b-4069-a625-b7d216802012",

        "ARN": "arn:aws:wafv2:us-east-2:783127631924:regional/webacl/test20200801/35e779c2-1c2b-4089-a615-b7d217801012",

        "DefaultAction": {

            "Allow": {}

        },

        "Description": "",

        "Rules": [

            {

                "Name": "test20200801",

                "Priority": 0,

                "Statement": {

                    "RateBasedStatement": {

                        "Limit": 1000,

                        "AggregateKeyType": "IP"

                    }

                },

                "Action": {

                    "Block": {}

                },

                "VisibilityConfig": {

                    "SampledRequestsEnabled": true,

                    "CloudWatchMetricsEnabled": true,

                    "MetricName": "test20200801"

                }

            }

        ],

        "VisibilityConfig": {

            "SampledRequestsEnabled": true,

            "CloudWatchMetricsEnabled": true,

            "MetricName": "test20200801"

        },

        "Capacity": 2,

        "ManagedByFirewallManager": false

    },

    "LockToken": "34194f29-b629-4df3-b57c-f3d0f79e7619"

}


列出目前被阻擋的 IP


# aws  wafv2  get-rate-based-statement-managed-keys  --scope REGIONAL --region us-east-2 --web-acl-name  test20200801 --web-acl-id  32f779c2-1c2b-4069-a625-b7d216802012 --rule-name  test20200801  |  jq '.ManagedKeysIPV4'


{

  "IPAddressVersion": "IPV4",

  "Addresses": [

    "210.85.244.94/32"

  ]

}


  • 這邊我使用 jq 來搭配過濾 IP v4 的部分, 原本會顯示 IPv4 與 IPv6


又前進了一步

~ enjoy it


Reference: