Ansible azure module - 利用 Dynamic inventory 建立 nagios server 與 client
上一篇文章實驗 azure Dynamic Inventory 來取得目前 Azure 上面所有主機
那麼有了這些資訊, 我們是不是就可以利用這個特性,
將 Azure 上面的機器按照不同的群組來進行不同的設定呢?
答案是可以的 :)
接下來進行相關實驗
OS: openSUSE Leap 42.3 in Azure
預計達成目標
Nagios Server x 1
- openSUSE Leap 42.3
- 使用標籤 NagiosServer
Nagios Client x 2
- openSUSE Leap 42.3
- 使用標籤 NagiosClient
跟之前的建立 Azure VM with Ansible 不同的是,
這次在建立VM的時候我們會加上 Tag (標籤) 的選項
建立 Azure with Tag VM 的 playbook 可以參考我的 Github
azure_create_tag_vm.yml 相關內容如下
---
# Azure VM 相關測試
# edit by sakana 2018/2/17
- name: use when conditionals and setup module
hosts: localhost
connection: local
#
vars_prompt:
- name: "resource_group"
prompt: "Enter resource group name"
private: no
default: sakanatest
- name: "admin_username"
prompt: "Enter admin username"
private: no
default: sakana
- name: "admin_password"
prompt: "Enter admin password"
private: yes
- name: "vm_tags"
prompt: "Enter VM Tag, like test=01"
private: no
- name: "sequence_start"
prompt: "Enter sequence start number"
private: no
default: 1
- name: "sequence_end"
prompt: "Enter sequence end number, Max is 99"
private: no
default: 10
- name: "vm_size"
prompt: "Enter VM size"
private: no
default: Basic_A1
- name: "image_offer"
prompt: "Enter image offer"
private: no
default: openSUSE-Leap
- name: "image_publisher"
prompt: "Enter image publisher"
private: no
default: SUSE
- name: "image_sku"
prompt: "Enter image sku"
private: no
default: 42.3
- name: "image_version"
prompt: "Enter image version"
private: no
default: latest
tasks:
- name: Create Azure test VM
# 可以用 with_sequence 方式, %0x 為序號, x是16進制, 所以我用 u 10進制
# 如果是 %02x 就是 2位數, 例如 server00
# 如果只設定 server%0x , 但是超出1位數, 例如 1 to 10, 最後一個會變成 servera
# stride=2 代表間隔是 2
# with_sequence: start=1 end=10 stride=1 format=server%02u
with_sequence: start={{ sequence_start }} end={{ sequence_end }} stride=1 format=test%02u
azure_rm_virtualmachine:
resource_group: "{{ resource_group }}"
# 這邊的 "{{ item }}" 對應到上面的 with_sequence
name: "{{ item }}"
admin_username: "{{ admin_username }}"
admin_password: "{{ admin_password }}"
# 這邊可以對應到已經有的儲存體
# 建立VM的時候會對應到儲存體, 如果只是實驗用, 可以對應到已經存在的儲存體
# 好處是移除的時候不用再手動移除
# 這個 storage_account 是已經建立好的, 請對應到已經存在儲存體
# storage_account: sakanatestdiag34
storage_account: sakanatestdiag340
# tag 實驗
tags: "{{ vm_tags }}"
# 經實驗 vm_size 是必須的
vm_size: "{{ vm_size }}"
#
# image 相關資訊可以使用 az vm image list --output table 查詢
image:
offer: "{{ image_offer }}"
publisher: "{{ image_publisher }}"
sku: "{{ image_sku }}"
version: "{{ image_version }}"
#
# Azure VM 相關測試
# edit by sakana 2018/2/17
- name: use when conditionals and setup module
hosts: localhost
connection: local
#
vars_prompt:
- name: "resource_group"
prompt: "Enter resource group name"
private: no
default: sakanatest
- name: "admin_username"
prompt: "Enter admin username"
private: no
default: sakana
- name: "admin_password"
prompt: "Enter admin password"
private: yes
- name: "vm_tags"
prompt: "Enter VM Tag, like test=01"
private: no
- name: "sequence_start"
prompt: "Enter sequence start number"
private: no
default: 1
- name: "sequence_end"
prompt: "Enter sequence end number, Max is 99"
private: no
default: 10
- name: "vm_size"
prompt: "Enter VM size"
private: no
default: Basic_A1
- name: "image_offer"
prompt: "Enter image offer"
private: no
default: openSUSE-Leap
- name: "image_publisher"
prompt: "Enter image publisher"
private: no
default: SUSE
- name: "image_sku"
prompt: "Enter image sku"
private: no
default: 42.3
- name: "image_version"
prompt: "Enter image version"
private: no
default: latest
tasks:
- name: Create Azure test VM
# 可以用 with_sequence 方式, %0x 為序號, x是16進制, 所以我用 u 10進制
# 如果是 %02x 就是 2位數, 例如 server00
# 如果只設定 server%0x , 但是超出1位數, 例如 1 to 10, 最後一個會變成 servera
# stride=2 代表間隔是 2
# with_sequence: start=1 end=10 stride=1 format=server%02u
with_sequence: start={{ sequence_start }} end={{ sequence_end }} stride=1 format=test%02u
azure_rm_virtualmachine:
resource_group: "{{ resource_group }}"
# 這邊的 "{{ item }}" 對應到上面的 with_sequence
name: "{{ item }}"
admin_username: "{{ admin_username }}"
admin_password: "{{ admin_password }}"
# 這邊可以對應到已經有的儲存體
# 建立VM的時候會對應到儲存體, 如果只是實驗用, 可以對應到已經存在的儲存體
# 好處是移除的時候不用再手動移除
# 這個 storage_account 是已經建立好的, 請對應到已經存在儲存體
# storage_account: sakanatestdiag34
storage_account: sakanatestdiag340
# tag 實驗
tags: "{{ vm_tags }}"
# 經實驗 vm_size 是必須的
vm_size: "{{ vm_size }}"
#
# image 相關資訊可以使用 az vm image list --output table 查詢
image:
offer: "{{ image_offer }}"
publisher: "{{ image_publisher }}"
sku: "{{ image_sku }}"
version: "{{ image_version }}"
#
建立 Nagios Server 與 Nagios Client 使用之前建立的 playbook
可以將目錄以及相關直接從 Github 上面直接下載下來
首先來建立 Nagios Server
使用上面的 azure_create_tag_vm.yml
- 這邊在詢問 VM Tag 的時候請輸入 Tag名稱=值, Tag名稱要符合等等要執行的 ansible playbook 設定, 這邊設定為 NagiosServer
$ ansible-playbook azure_create_tag_vm.yml
[WARNING]: Unable to parse /etc/ansible/hosts as an inventory source
[WARNING]: No inventory was parsed, only implicit localhost is available
[WARNING]: provided hosts list is empty, only localhost is available. Note that the implicit localhost does not match 'all'
Enter resource group name [sakanatest]:
Enter admin username [sakana]:
Enter admin password:
Enter VM Tag, like test=01: NagiosServer=01
Enter sequence start number [1]:
Enter sequence end number, Max is 99 [10]: 1
Enter VM size [Basic_A1]:
Enter image offer [openSUSE-Leap]:
Enter image publisher [SUSE]:
Enter image sku [42.3]:
Enter image version [latest]:
PLAY [use when conditionals and setup module] **********
建立完成可以到虛擬機器觀察
上面會出現 NagiosServer:01 的資訊

建立 2 台 Nagios Client
使用上面的 azure_create_tag_vm.yml
- 這邊在詢問 VM Tag 的時候請輸入 Tag名稱=值, Tag名稱要符合等等要執行的 ansible playbook 設定, 這邊設定為 NagiosClient
$ ansible-playbook azure_create_tag_vm.yml
[WARNING]: Unable to parse /etc/ansible/hosts as an inventory source
[WARNING]: No inventory was parsed, only implicit localhost is available
[WARNING]: provided hosts list is empty, only localhost is available. Note that the implicit localhost does not match 'all'
Enter resource group name [sakanatest]:
Enter admin username [sakana]:
Enter admin password:
Enter VM Tag, like test=01: NagiosClient=01
Enter sequence start number [1]: 2
Enter sequence end number, Max is 99 [10]: 3
Enter VM size [Basic_A1]:
Enter image offer [openSUSE-Leap]:
Enter image publisher [SUSE]:
Enter image sku [42.3]:
Enter image version [latest]:
PLAY [use when conditionals and setup module] ************************************************
建立完成可以到虛擬機器觀察
上面會出現 NagiosClient:01 的資訊

補充說明一下
Azure 內的 Tag 不是 Ansible 工作的 tags
- Azure 的 Tag 為 key=value 的形式, 目前看起來只會吃前面的 key, 例如 VM的 Tag 為 test=01, 在 Azure Dynamic Inventory 的時候, 會建立一個 test的群組, 所以可以把他視為群組使用
- 所以去修改 azure_create_vm.yml , 加入 vm_tags 的變數, 好讓以後可以分不同群組來進行像是 nagios 或是 spark 安裝的應預
觀察相關資訊
這邊其實會發現, 我們剛剛建立的標籤, 被類似群組的方式將主機區分出來
# ./azure_rm.py --pretty
{
"NagiosClient": [
"test02",
"test03"
],
"NagiosClient_01": [
"test02",
"test03"
],
"NagiosServer": [
"test01"
],
"NagiosServer_01": [
"test01"
],
當然也可以進一步觀察 azure 裡面的單一 VM 的 facts
# ansible -i azure_rm.py test03 --ask-pass -u sakana -m setup
進入正題
Nagios with ansible in Azure
切換到剛剛下載的 nagios playbook, 把 azure_rm.py 也複製過來吧
# ls
ansible.cfg azure_rm.py deploy_ssh_key.sh files hosts nagios_client_install.yml nagios_server_install.yml
來安裝 Nagios Server 吧
Azure 因為有 sudo , 所以 要加上 --ask-sudo-pass
# ansible-playbook -i azure_rm.py --ask-pass --ask-sudo-pass -u sakana nagios_server_install.yml
完成安裝之後
去修改 Nagios Server 的 網路安全性群組( NSG ), 加入 port 80(HTTP)
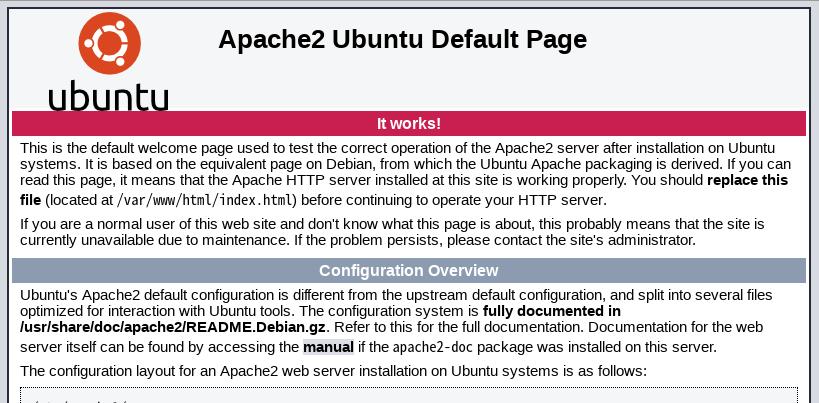
開啟網頁觀察一下

來安裝 Nagios Client 吧
# ansible-playbook -i azure_rm.py --ask-pass --ask-sudo-pass -u sakana nagios_client_install.yml
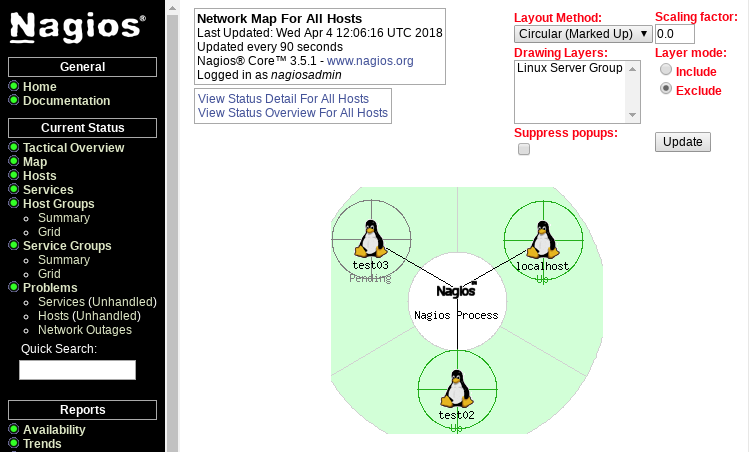
裝完之後觀察一下 Nagios
Notes:
- Cloud-shell 好像不能自己裝套件, 所以我就裝不了 sshpass
- Azure 因為有 sudo , 所以 要加上 --ask-become-pass
- 因為 Azure 有 cloud 工具套件所以 zypper 的 module 要加入 disable_gpg_check=yes
又往前跨一步
~ enjoy it
Reference: