2013IT鐵人賽-03-程式學習紀錄-git01-使用git與GitHub紀錄

今天的名稱很長, 所以我也趁機說明以下之後發表文章的命名方式
2013IT鐵人賽-03-程式學習紀錄-git01-使用git與GitHub紀錄
- 2013IT鐵人賽 這個開頭是固定的.
- -03 代表30天不中斷的第3篇.
- 程式學習紀錄 這個部份應該只有前面在做學習準備才會出現的標題.
- git01 這個部份就會代表學習的種類, git01 就是git 的第1篇, 也就是說有可能也會出現ruby01 或是 java01 這樣的命名.
- 使用git與GitHub紀錄 則是此次文章的主要標題.
在有了隨時可以存取的開發作業環境 EasyCloud 之後, 接下來就會思考, 那自己撰寫的程式碼要如何儲存下來呢? 另外在學習git的時候如果不是自己的檔案, 一般來說在書上練習的都是建立 foo.txt 或是 bar.txt 這樣的練習檔案, 所以在實習上面是非常無感的. 所以這次在學習雜記的規劃上面就想把後續學習的程式碼都放在git上面. 之前有考慮dropbox, 可是dropbox 在client那邊都要裝程式. (咦? git 不是也要裝), 然後如果只是要練習程式, 在我們每使用一個VM就要同步 N個GB的檔案, 應該也受不了吧. ^—^
那如果要放在git上面, 接下來的考量點就是
- 架設 git server
- SSH with git
- Dropbox with git
- GitHub
- 當然還有其他的方案......
之後文章我所選用的都是 openSUSE 12.2 的版本.
請參考官方的說明(目前有VNC 或是 SSH 兩種模式連入) http://easycloud.nchc.org.tw/index.php/%E7%99%BB%E5%85%A5%E8%99%9B%E6%93%AC%E6%A9%9F%E5%99%A8 , 登入自己建立的VM.
請以 root 登入到主機, 或是透過 su - 來切換使用者身份.
以下的作法是使用command line 的方式來建立, 因為講求快速的關係, 使用圖形介面也可以達成同樣的效果.
Step 1: 安裝 git 套件
參考 GitHub 官方網頁的介紹
查詢是否有安裝 git 套件?
命令提示字元前面的 # 代表是root 身份, 請協助確認, 另外只要輸入 # 之後的指令即可.
# zypper search git
正在載入套件庫資料...
讀取已安裝的套件...
S | 名稱 | 摘要 | 類型
--+----------------------------+--------------------------------------+---------
| cgit | A web frontend for git repositories | 套件
| cgit | A web frontend for git repositories | src 套件
| git | Fast, scalable, distributed revisi-> | 套件
目前並沒有安裝 git 套件, 所以我們來安裝他.
# zypper install git
正在載入套件庫資料...
讀取已安裝的套件...
正在解決套件相依性...
將會安裝下列新的套件:
cvs cvsps git git-core git-cvs git-email git-gui gitk git-svn git-web libapr1
libapr-util1 libserf-1-0 perl-Authen-SASL perl-Clone perl-DBD-SQLite perl-DBI
perl-Error perl-MLDBM perl-Net-Daemon perl-Net-SMTP-SSL perl-Params-Util
perl-PlRPC perl-SQL-Statement subversion subversion-perl
下列推薦的套件已自動被選取:
git-cvs git-email git-gui gitk git-svn git-web perl-Authen-SASL perl-Clone
perl-MLDBM perl-Net-Daemon perl-Net-SMTP-SSL perl-PlRPC perl-SQL-Statement
下列套件是建議的,但將不會被安裝:
git-daemon
26 新套件將被安裝.
全部下載大小: 8.3 MiB。 完成操作後,將增加 33.8 MiB 的使用。
要繼續嗎? [y/n/?] (y): y (請輸入y同意安裝)
確認是否有安裝
# zypper search git
正在載入套件庫資料...
讀取已安裝的套件...
S | 名稱 | 摘要 | 類型
--+----------------------------+--------------------------------------+---------
| cgit | A web frontend for git repositories | 套件
| cgit | A web frontend for git repositories | src 套件
i | git | Fast, scalable, distributed revisi-> | 套件
接下來在安裝 git-daemon 套件, 如果以後要使用 Password Cache 機制, 避免出現以下錯誤
(error: cannot run git-credential-cache--daemon: No such file or directory
fatal: unable to start cache daemon: No such file or directory)
# zypper install git-daemon
正在載入套件庫資料...
讀取已安裝的套件...
正在解決套件相依性...
將會安裝下列新的套件:
git-daemon
1 新套件將被安裝.
全部下載大小: 358.1 KiB。 完成操作後,將增加 1.2 MiB 的使用。
要繼續嗎? [y/n/?] (y): y
確認已經安裝 git 套件.接下來進行git的初始化動作.
首先可以先切換到要儲存 git 的目錄, 但是由於我是使用 VM 來進行練習, 我就直接放在家目錄底下了(使用 git 不一定要使用 root 身份).
還沒有初始化之前, 先觀察目前的目錄底下的物件.
# ls -a
. Desktop .gstreamer-0.10 Music Videos
.. Documents .gtk-bookmarks Pictures .viminfo
.bash_history Downloads .ICEauthority Public .xauthJjBAGT
bin .esd_auth inst-sys .pulse .xsession-errors
.cache .gconf .kbd .pulse-cookie .xsession-errors.old
.config .gnome2 .local .rcc
.dbus .gnupg .mission-control Templates
接下來我們來初始化 git (建立初始容器)
# git init
Initialized empty Git repository in /root/.git/
再次觀察目錄下的物件, 會發現多了 .git 目錄
# ls -a
. Downloads inst-sys .rcc
.. .esd_auth .kbd Templates
.bash_history .gconf .local Videos
bin .git .mission-control .viminfo
.cache .gnome2 Music .xauthJjBAGT
.config .gnupg Pictures .xsession-errors
.dbus .gstreamer-0.10 Public .xsession-errors.old
Desktop .gtk-bookmarks .pulse
Documents .ICEauthority .pulse-cookie
觀察 .git 目錄下的內容 (這個以後的章節在慢慢介紹以及研究)
# ls -a .git/
. .. branches config description HEAD hooks info objects refs
目前先觀察 .git 目錄下的 config 檔案
# cat .git/config
[core]
repositoryformatversion = 0
filemode = true
bare = false
logallrefupdates = true
在官方網頁的說明
Username
First you need to tell git your name, so that it can properly label the commits you make.
$git config --global user.name "Your Name Here"
這邊要注意的是在設定 git config 的時候有下 --global 參數(這個部份後續再來討論)
- 會存入 ~/.gitconfig 檔案
- 以使用者為影響範圍
所以就進行以下的指令來設定(名字的部份請用英文, 避免用中文)
# git config --global user.name "你的名字"
觀察一下目錄以及相關的設定檔 (多了 ~/.gitconfig 但是 .git/config 沒有變動)
# ls -a
. .config .esd_auth .gnupg .kbd Public Videos
.. .dbus .gconf .gstreamer-0.10 .local .pulse .viminfo
.bash_history Desktop .git .gtk-bookmarks .mission-control .pulse-cookie .xauthJjBAGT
bin Documents .gitconfig .ICEauthority Music .rcc .xsession-errors
.cache Downloads .gnome2 inst-sys Pictures Templates .xsession-errors.old
# cat .git/config
[core]
repositoryformatversion = 0
filemode = true
bare = false
logallrefupdates = true
# cat ~/.gitconfig
[user]
name = Max Huang
Email
Git saves your email address into the commits you make. We use the email address to associate your commits with your GitHub account.
$git config --global user.email "your_email@example.com"
看了說明, 也就是這邊設定的e-mail 要跟 GitHub 上面的e-mail 相關連.
# git config --global user.email "你的電子郵件"
觀察相關設定
# cat ~/.gitconfig
[user]
name = Max Huang
email = sakana@cycu.org.tw
Password caching
The last option we need to set will tell git that you don't want to type your username and password every time you talk to a remote server.
To use this option, you need to turn on the credential helper so that git will save your password in memory for some time:
$git config --global credential.helper cache
這個部份就是如果不想每次使用的時候都輸入密碼就可以使用快取的機制
# git config --global credential.helper cache
# cat ~/.gitconfig
[user]
name = Max Huang
email = sakana@cycu.org.tw
[credential]
helper = cache
也可以進一步設定快取的時間
By default git will cache your password for 15 minutes. You can change this if you like.
$git config --global credential.helper 'cache --timeout=3600'
那就來設定看看, 將快取時間調整為 1 小時
# git config --global credential.helper 'cache --timeout=3600'
# cat ~/.gitconfig
[user]
name = Max Huang
email = sakana@cycu.org.tw
[credential]
helper = cache --timeout=3600
Step 2: 註冊GitHub帳號
請上 GitHub 官方網站註冊帳號 https://github.com/
只要在網頁上面輸入
使用者帳號(會檢查是否有跟其他人重複)
E-mail
密碼
點選 Sign up for GitHub
就申請完成.....(甚至沒有 E-mail 驗證 XD )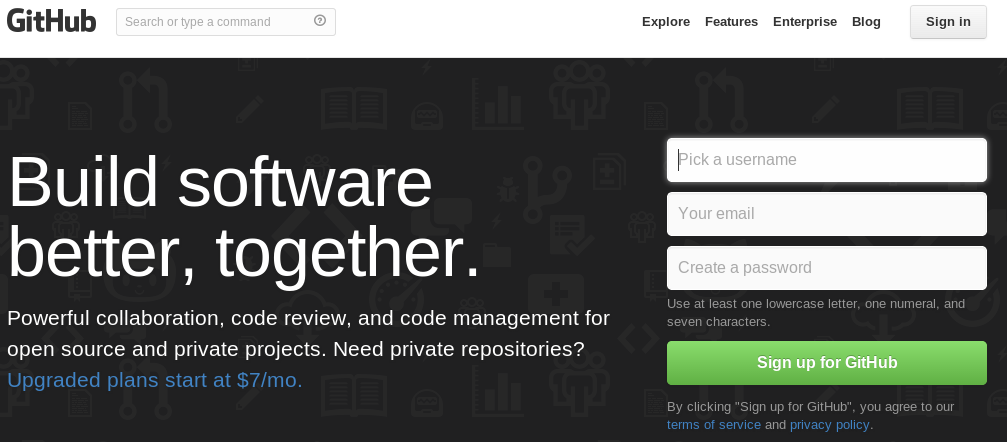
Step 3: 建立 repo
接下來就可以按右上角的 Sign in 進行登入.
登入之後可以點選右上角或是畫面中間右邊的 New repository 按鈕

接下來輸入 Repository 的名稱, 在GitHub 內Public repo 是免費的, 我們就選public.
點選 Create repository 建立repository.

接下來就會產生一個自己的git
https://github.com/[帳號名稱]/[repo名稱]
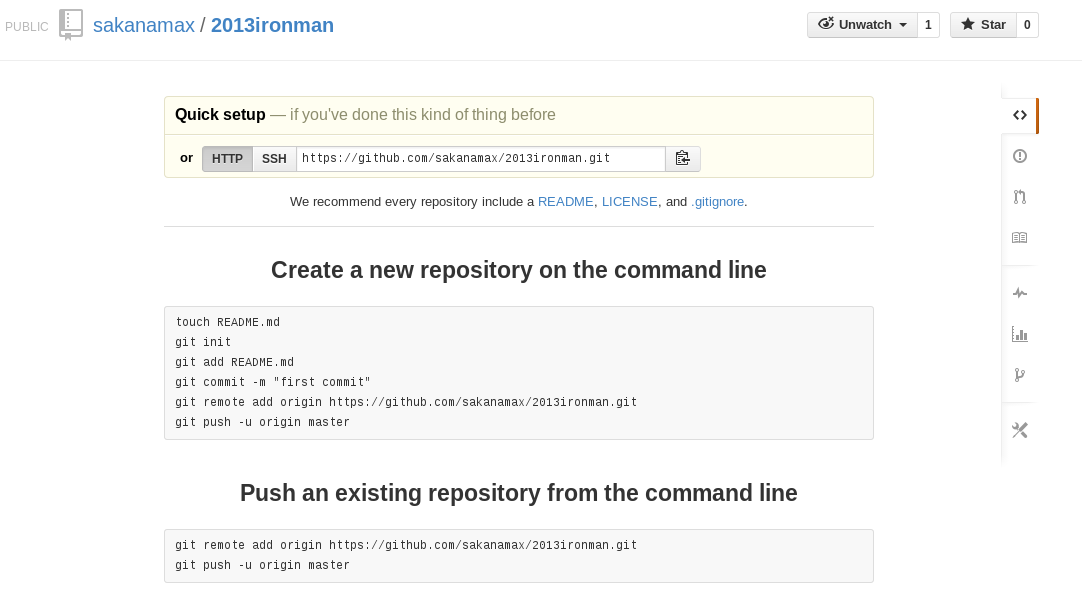
依造相關指示建立 repo (之前我們已經先建立過 git init 了)
建立 README.md
# touch README.md
觀察相關目錄
# ls
bin Desktop Documents Downloads inst-sys Music Pictures Public README.md Templates Videos
將 README.md 加入 git
# git add README.md
執行 git commit (送交檔案)
# git commit -m 'first commit'
[master (root-commit) ecf4424] first commit
0 files changed
create mode 100644 README.md
加入遠端GitHub
觀察相關設定
# cat .git/config
[core]
repositoryformatversion = 0
filemode = true
bare = false
logallrefupdates = true
[remote "origin"]
url = https://github.com/sakanamax/2013ironman.git
fetch = +refs/heads/*:refs/remotes/origin/*
將檔案 push 到遠端
# git push origin master
Username for 'https://github.com': 請輸入你的帳號
Password for 'https://sakanamax@github.com': 請輸入你的密碼
Counting objects: 3, done.
Writing objects: 100% (3/3), 214 bytes, done.
Total 3 (delta 0), reused 0 (delta 0)
To https://github.com/sakanamax/2013ironman.git
* [new branch] master -> master
再次觀察 GitHub 上面的repo
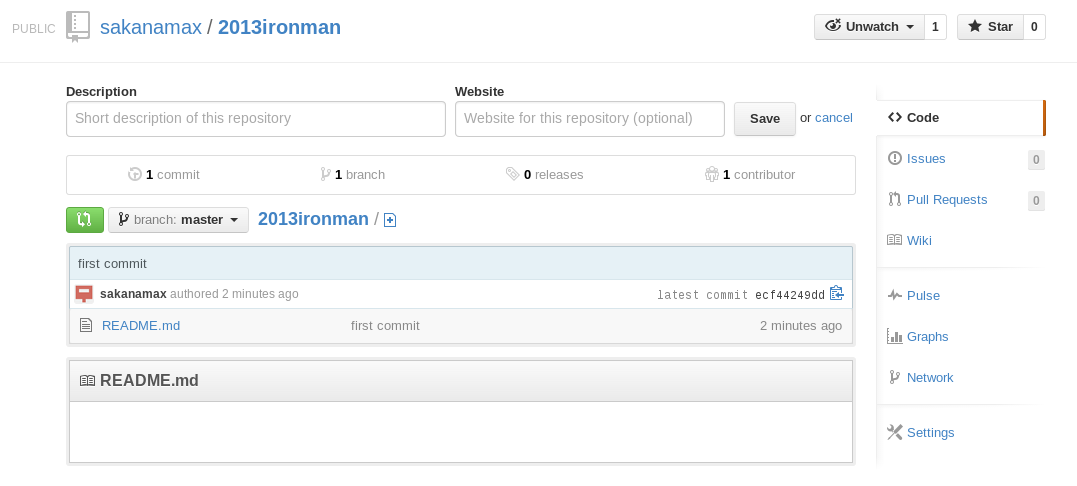
到這邊 git 以及 GitHub 上面的設定也暫時告一段落 :-)
Fun with Day 3 ~