GCP 平臺建立 Managed instance groups 與 Load balancing 小記
今天來整理 GCP 上面使用 Managed instance group 與 Load balancing 的一些操作與想法
情境如下
使用者透過 Load balancer IP 來進行存取, 後端連接 Managed instance group 來提供服務
==== 準備服務主機 ====
先使用 gcloud 指令建立 openSUSE Leap GCE
使用 Portal 上面的 SSH 登入主機
使用 zypper 指令安裝 apache2, 啟用並設定開機啟動
# zypper install apache2
# systemctl start apache2
# systemctl enable apache2
參考網路上網頁顯示主機名稱或是 URL 的方式
將相關網頁存成 /srv/www/htdocs/index.html
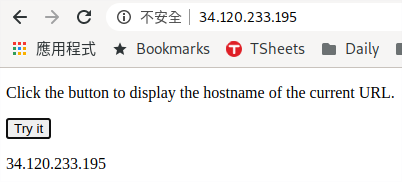
網頁呈現如下

這個方法目前沒有很好, 因為在後續 LB 測試的時候只會顯示 LB 的 IP, 後面再找其他的方式來顯示後端主機的 hostname or IP
將主機關機, 等等建立為映像檔
==== 建立主機映像檔 ====
點選 Compute Engine -- > Images -- > CREATE IMAGE

輸入名稱 / 選取 Source disk / 選取 Location ( 我這邊選 Taiwan )
點選 Create 建立
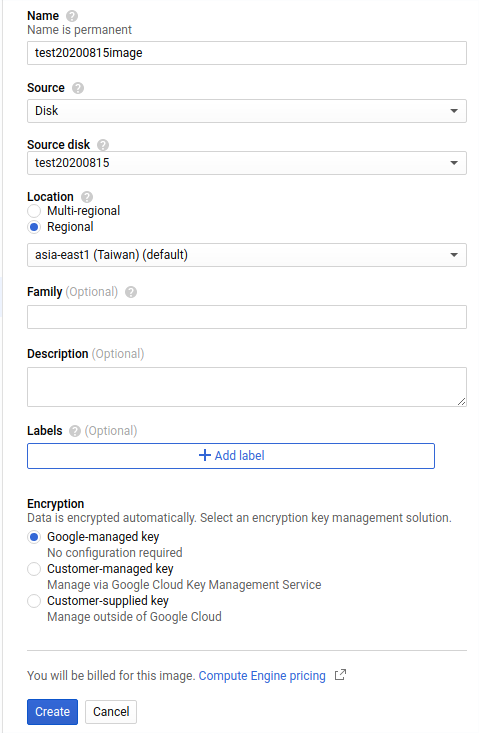
觀察資訊

==== 建立 Instance templates ====
點選 Compute Engine -- > 點選 Instance templates
點選 Create Instance template

輸入 名稱 / 選取機器的規格

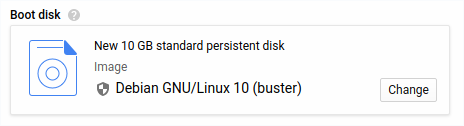
點選 Boot disk 的 change
點選 Custom images
點選 剛剛建立的 image
點選 Select

可以觀察到剛剛的 image 已經被選取
是專案狀況看看要不要調整 networking 或是 security
點選 Create
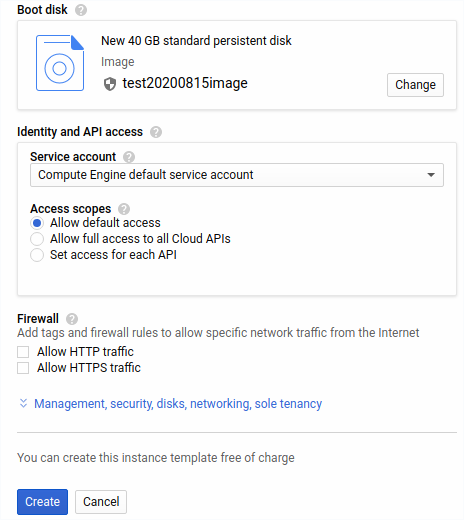
這邊要注意, 如果 firewall 是採取 tag 的方式, 記得按照需求加上 network tag
也要注意 VPC 的選定是否正確
觀察資訊

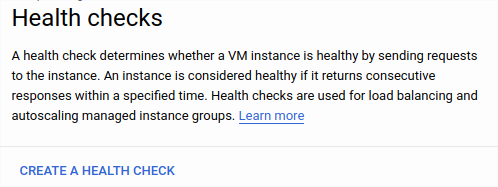
==== 建立 Health check ====
點選 Compute Engine -- > 點選 Health checks
點選 CREATE A HEALTH CHECK
輸入 名稱 -- > 選取 Scope / Protocol 與 port
輸入 檢查區間
點選 CREATE
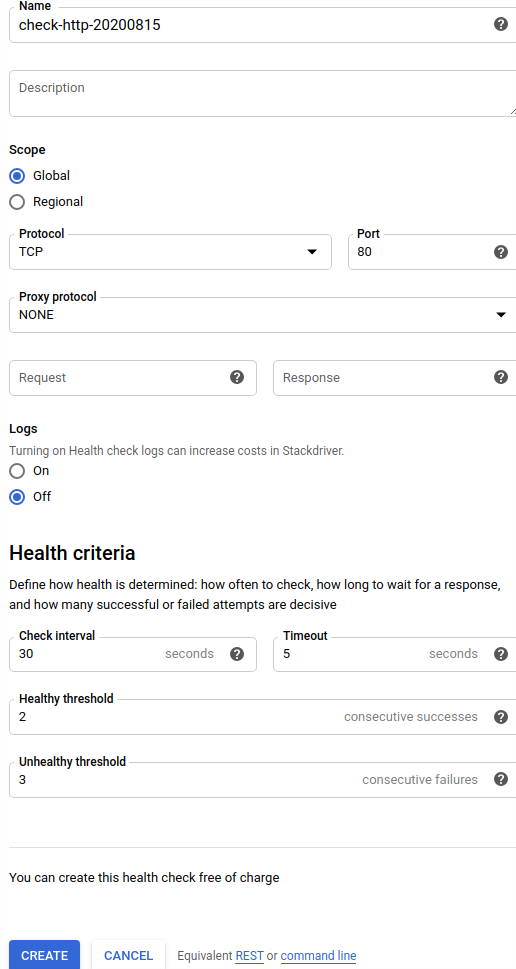
Check Interval 按照實際需求來調整, 但是最好是超過 10 秒以上, 不然後面建立 Instance group 也會被警告
Unhealthy threshod 最好也是超過 3 次, 不然也會被警告
觀察相關資訊

==== 建立 Managed instance Group 與設定 Auto scaling ====
點選 Compute Engine -- > 點選 Instance groups
點選 Create instance group

點選 New managed instance group
輸入 名稱 -- > 選取 Location
選取 剛剛建立的 Instance template
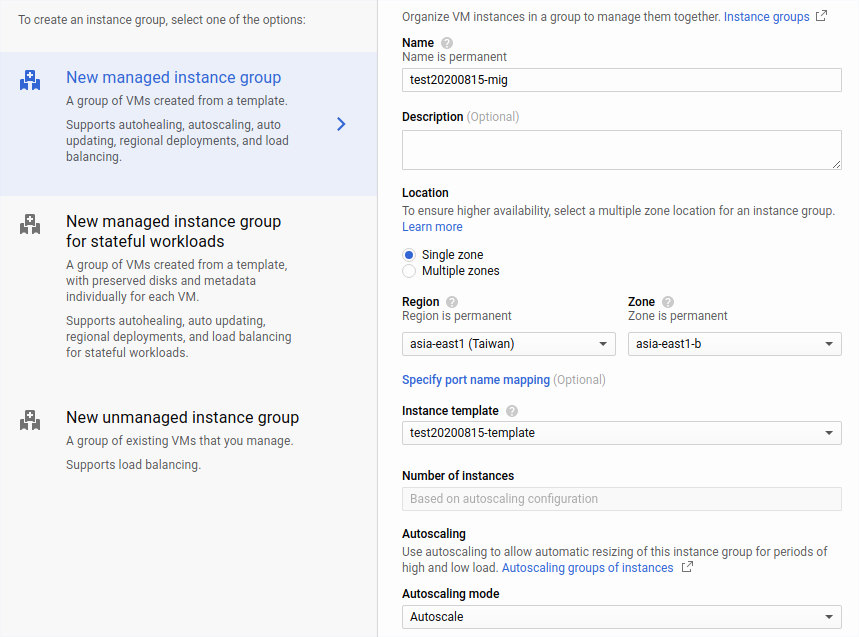
這邊按照需求選取 Auto scaling 的條件, 預設是 CPU 使用率超過 60%
設定 最少 與 最大的 instance 數量
選取 Health check 方式 (使用剛剛建立的 Health check )
點選 Create

觀察相關資訊
Instance groups:

VM instances:

如果有遇到 Health check 沒過的問題

官方文件有提到要針對 130.211.0.0/22 與 35.191.0.0/16 要設定防火牆規則允許通過
https://cloud.google.com/load-balancing/docs/https/ext-http-lb-simple
我是設定 Target 針對所有 instance, 然後 130.211.0.0/22 與 35.191.0.0/16 的 TCP port 80 allow, 比較嚴謹的方式當然也可以下 tag 來處理, 但是還要個別打上 tag, 然後 130.211.0.0/22 與 35.191.0.0/16 又是 google 宣告的網段, 所以就先這樣處理
Firewall 的規劃可能考量
Load Balancer + Instance Group內的GCE 都允許 port 80 存取
設定 130.211.0.0/22 與 35.191.0.0/16 可以存取 tcp port 80
使用 tag 方式, 設定 0.0.0.0/0 可以存取 tcp port 80, 在 instance group template 內加入該 tag
效果
存取 LB IP -- > Pass
存取 後端 Instance Group 產生的 GCE IP -- > Pass
只允許 Load Balancer 轉發 port 80 到 Instance Group 內的 GCE
設定 130.211.0.0/22 與 35.191.0.0/16 可以存取 tcp port 80
效果: 不希望使用者直接打後端的 node, 避免程式寫死存取某一個 node IP, 只允許存取 Load Balancer 的 IP
存取 LB IP -- > Pass
存取 後端 Instance Group 產生的 GCE IP -- > ERR_CONNECTION_TIMED_OUT
對於 Source IP 說明的截圖

==== 建立 Load balancing ====
點選 Network services 點選 Load balancing
點選 Create load balancer

點選 HTTP(S) Load Balancing 的 Start configuration
這邊就以實際的狀況來選取

選取外部還是內部的 Load Balancer
點選 Continue

輸入名稱
點選 Backend configuration
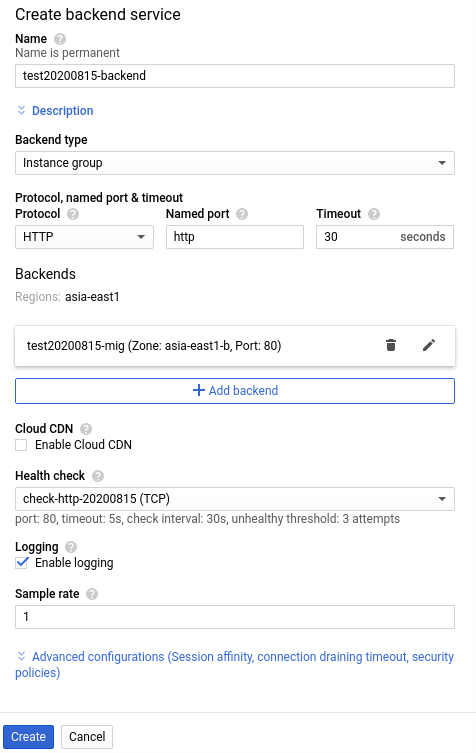
下拉選單, 點選 Backend services -- > 點選 Create a backend service

輸入 名稱
在 New Backend:
選取 剛剛建立 Instance Group
輸入要連接的 port
設定 Balancing mode
點選 Done

Backend service 有個 Named port 就是從外部接入的 port 是那一個, 然後 instance group 可以設定 Named port 連接進來後, 要到 instance group 內的機器的對應 port
會觀察到剛剛建立的 Backend 顯示到資訊內
選取 剛剛建立的 Health Check
點選 Create
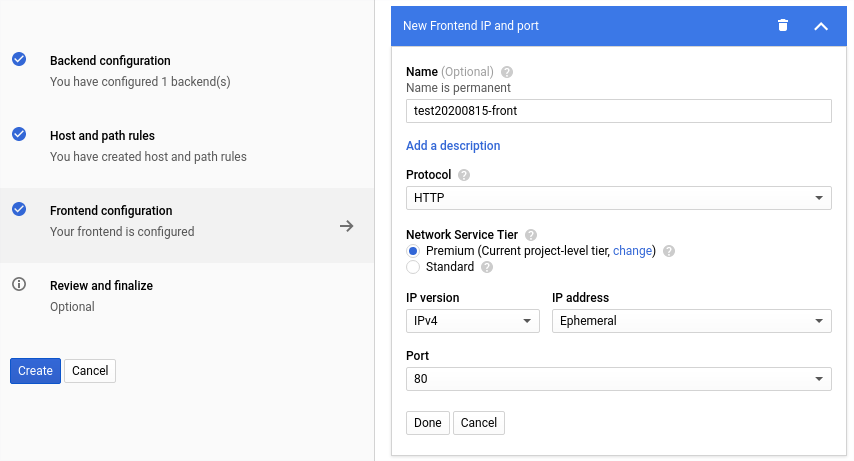
點選 Fronted configuration
輸入名稱 / Protocol / Port
點選 Done
觀察資訊
確認 Frontend 已經被建立
點選 Create

觀察資訊

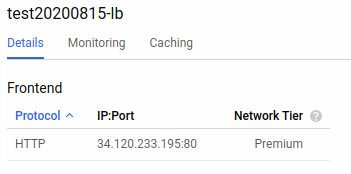
點選剛剛建立的 Load balancer
觀察 LB 的 IP
觀察是否可以存取
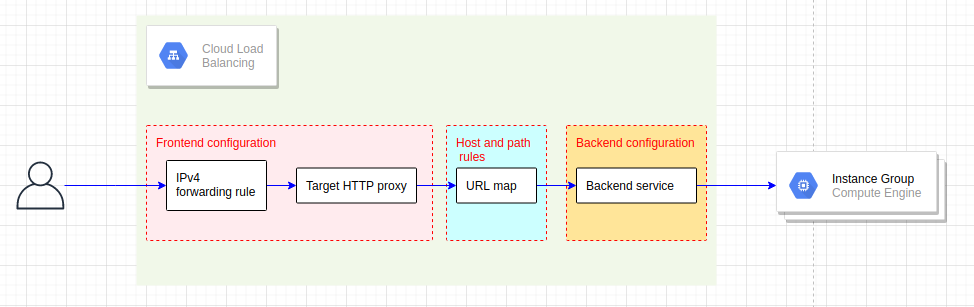
最後來聊聊 Load balancing 的組成
這個也是剛接觸最讓我迷惑的部分 :p
Load balancing 組成分為 4 個部分
Forwarding rule
如果是透過 portal 設定, 是在 Frontend configuration 被設定, 但是沒有在界面提到這個關鍵字
Target HTTP proxy
如果是透過 portal 設定, 是在 Frontend configuration 被設定, 但是沒有在界面提到這個關鍵字
URL map
如果是透過 portal 設定, 大部分在建立 Backend Service 的時候就被設定預設,但是沒有在界面提到這個關鍵字
Backend Service
非常清楚
如果不是使用 gcloud 指令建立 Load balancer 而是使用 portal 建立的話
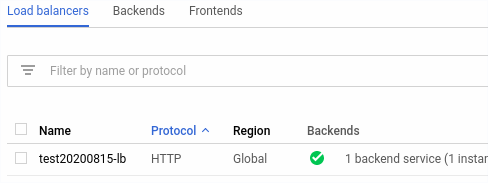
會看到 Load balancing 介面預設顯示爲
Load balancers
這邊想法上會認為是主體, 這個部分不會有問題
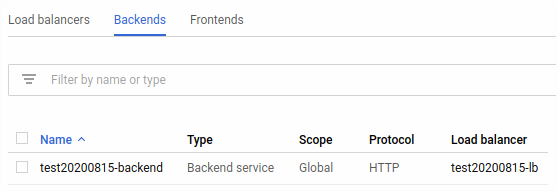
Backends
這邊是後端服務, 這個部分不會有問題
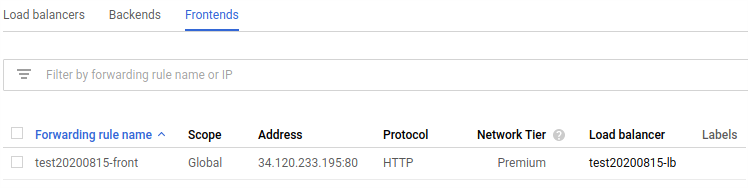
Frontends
這邊比較會產生困惑, 因為可以看到上面顯示的是 Forwarding rule name
點選 Load balancing 的 advanced menu, 觀察界面
Forwarding rules
Target proxies
Backend services
Backend buckets
Certificates
Target pools


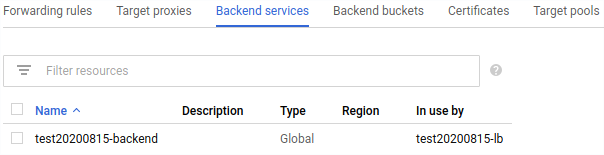
Advanced menu 可以觀察 Forwarding rules 與 Target proxies ( Frontend ), Backend 被拆分成 Backend services 與 Backend buckets
可以從剛剛建立的 test20200815-front 觀察
Forwarding rule: test20200815-front 有 IP address, 然後指向 test20200815-lb-target-proxy
Target Proxy 會對應到 URL map ( 某一個 LB 主體內的 Host and Path )
URL map ( LB 主體內的 Host and Path ) 會指定 Backend
指定的 Backend 會對應到後端的服務
如果是透過 gcloud 指令建立, 就比較清楚, 分別爲
# gcloud compute health-check create
# gcloud compute backend-services create
# gcloud compute backend-service add-backend
# gcloud compute url-maps create
# gcloud compute target-proxies create
# gcloud compute forwarding-rule create
今天也算是好好整理之前想整理的部分了
~ enjoy it
Reference:
沒有留言:
張貼留言