NextCloud and openSUSE in RPi3 workshop 101
OS: openSUSE Leap 42.3 with Raspberry Pi 3
OS: openSUSE Leap 42.3 in Azure
講師是 Gary Lin
投影片
連接到 Raspberry Pi 3
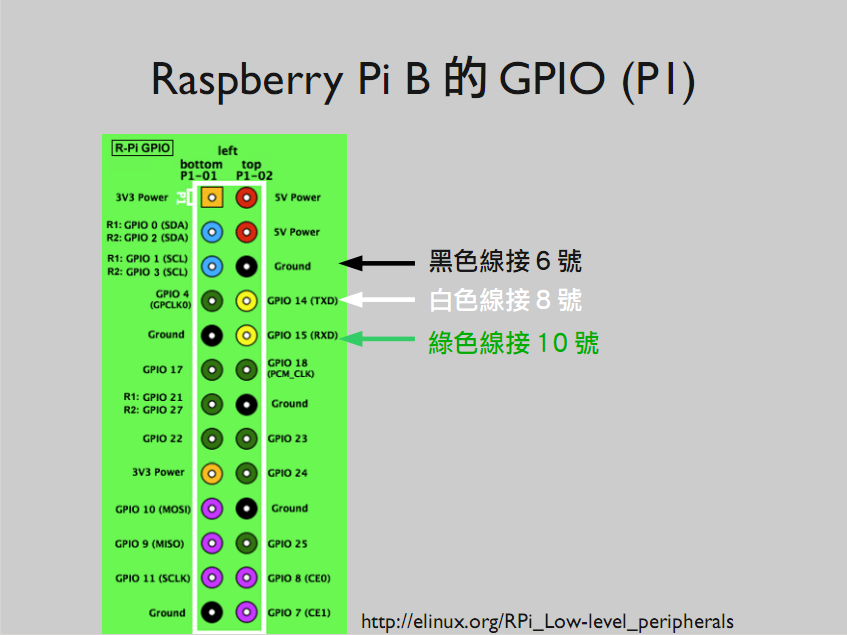
然後在 Mac 上面
#screen /dev/cu.usbserial 115200
就可以連線進 Raspberry Pi 3
利用 #yast lan 設定網路連接, 準備測試
OS: openSUSE Leap 42.3 in Azure
開啟 openSUSE Leap 42.3 VM in Azure
- 網路安全性群組開啟 SSH 與 HTTP
Nextcloud 12 基本需求
- PHP
- 7.0 or 7.1 ( 不支援 7.2 )
- Database
- MYSQL / MariaDB 5.5 or PostgresSQL 9
- Web Server
- Apache 2.4 + mod_php or Nginx + php-fpm
安裝相關套件
# zypper install apache2 apache2-mod_php7 mariadb php7-gd php7-json php7-fpm php7-mysql php7-curl
#zypper install php7-intl php7-mcrypt php7-zip php7-mbstring php7-zlib php7-openssl php7-fileinfo php7-posix
啟動 mysql 服務
# systemctl start mysql
設定開機啟動 mysql
# systemctl enable mysql
Created symlink from /etc/systemd/system/multi-user.target.wants/mysql.service to /usr/lib/systemd/system/mysql.service.
設定 mysql 管理者密碼
#mysqladmin -u root password
New password:
Confirm new password:
登入 mysql 並建立 DB 與設定使用者帳密
# mysql -u root -p
Enter password:
Welcome to the MariaDB monitor. Commands end with ; or \g.
Your MariaDB connection id is 5
Server version: 10.0.32-MariaDB SLE 12 SP1 package
Copyright (c) 2000, 2017, Oracle, MariaDB Corporation Ab and others.
Type 'help;' or '\h' for help. Type '\c' to clear the current input statement.
MariaDB [(none)]>
MariaDB [(none)]> CREATE DATABASE nextcloudb;
MariaDB [(none)]> GRANT ALL ON nextcloudb.* TO ncuser@localhost
IDENTIFIED BY 'dbpass';
MariaDB [(none)]> Bye
- ncuser -- 登入帳號
- Dbpass -- 登入密碼
==== 設定 PHP ( optional ) ====
這邊有些設定會牽動日後的檔案上傳, 所以視情況調整, 尤其是 post_max_size :)
#vim /etc/php7/apache2/php.ini
post_max_size = 50G
upload_max_filesize = 25G
max_file_uploads = 20
max_input_time = 3600
max_execution_time = 3600
session.gc_maxlifetime = 3600
memory_limit = 128M
========================
啟用相關 apache module
# a2enmod php7
# a2enmod rewrite
# a2enmod headers
確認掛載的 module
# apachectl -M
啟動 apache 服務
# systemctl start apache2.service
# systemctl enable apache2.service
Created symlink from /etc/systemd/system/httpd.service to /usr/lib/systemd/system/apache2.service.
Created symlink from /etc/systemd/system/apache.service to /usr/lib/systemd/system/apache2.service.
Created symlink from /etc/systemd/system/multi-user.target.wants/apache2.service to /usr/lib/systemd/system/apache2.service.
==== 建立資料區( optional ) ====
這邊則是如果有外接式硬碟或是儲存空間會進惜調整
假設外接硬碟掛載在 /mnt/
# mkdir /mnt/nextcloud_data
# chmod 770 /mnt/nextcloud_data
# chown wwwrun /mnt/nextcloud_data
=========================
安裝 nextcloud
解開 .zip 檔案
# unzip nextcloud-*.zip
將解開的目錄複製到 apache2 根目錄
# cp -r nextcloud /srv/www/htdocs/
修改擁有者為 wwwrun
# chown -R wwwrun /srv/www/htdocs/nextcloud/
連接到 nextcloud
開啟 http://<server ip>/nextcloud
預設值是使用 SQLite, 所以要手動選擇
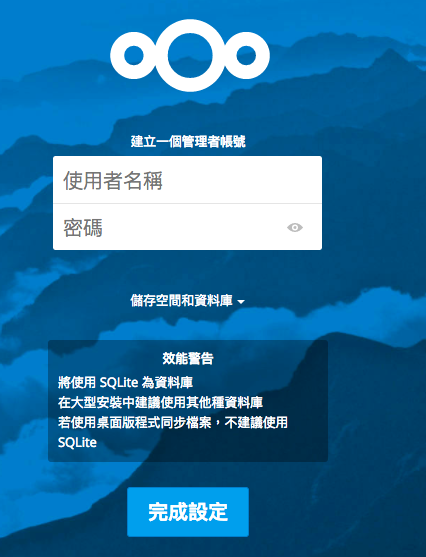
點選 儲存空間與資料庫
點選 MySQL/MariaDB
輸入 管理者帳號 / 密碼, MySQL 帳號 / 密碼, SQL db 名稱
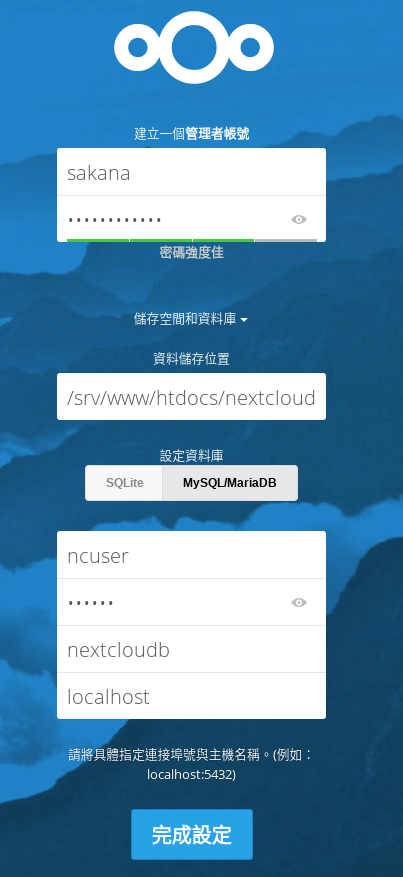
點選完成設定
- 預設的資料區路徑 /srv/www/htdocs/nextcloud/data
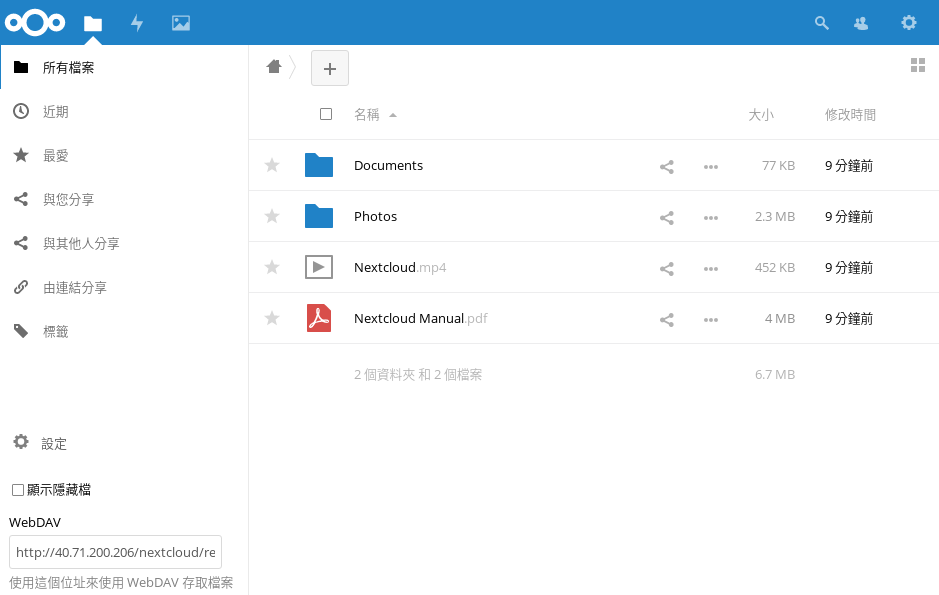
在 Client 的部份, 除了 PC 以外也可以使用 Android 與 iOS 程式連接
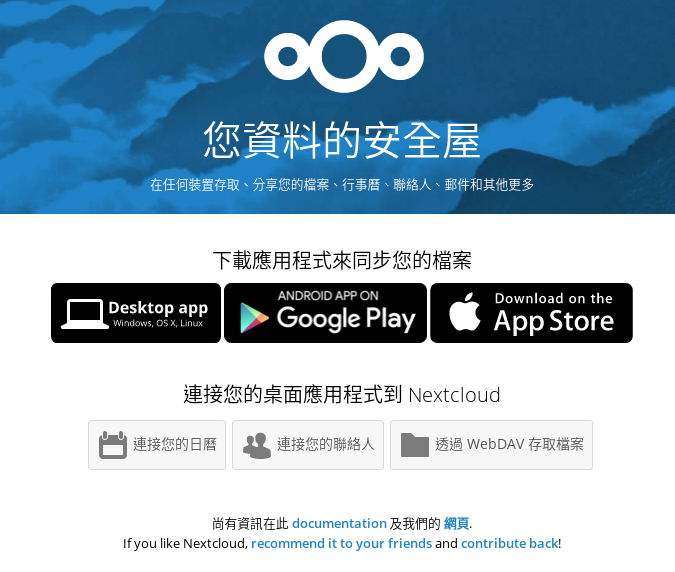
連結的位置可以點選左下角的設定
會出現 WebDAV 路徑, 用這個路徑來進行連線
基本上就是 https:// or http://<your_Server_IP>/nextcloud
資料區預設的路徑在 /srv/www/htdocs/nextcloud/data ,
存放的檔案會在/srv/www/htdocs/nextcloud/data/使用者帳號/files 目錄
所以如果使用者是 sakana, 就是 /srv/www/htdocs/nextcloud/data/sakana/files
狀況:
如果在系統內手動建立或複製檔案到 /srv/www/htdocs/nextcloud/data/sakana/files 不會出現在 nextcloud 內
# pwd
/srv/www/htdocs/nextcloud/data/sakana/files
# touch test20180121.txt
# ls
Documents Nextcloud Manual.pdf Nextcloud.mp4 Photos test20180121.txt
如果手動放檔案, 使用 occ 指令更新 nextcloud 內的檔案 list
# sudo -u wwwrun php /srv/www/htdocs/nextcloud/occ files:scan --all
The process control (PCNTL) extensions are required in case you want to interrupt long running commands - see http://php.net/manual/en/book.pcntl.php
Starting scan for user 1 out of 1 (sakana)
+---------+-------+--------------+
| Folders | Files | Elapsed time |
+---------+-------+--------------+
| 4 | 8 | 00:00:00 |
+---------+-------+--------------+
Reference:
感謝今天 Gray 的分享
讓我們可以給 Raspberry Pi 又多一個用法
在 Azure 上面測試也沒有問題
~ enjoy it
沒有留言:
張貼留言