EsayRTC 安裝流程 version 0.01 by Max
測試時間: 2012/12/22
建立環境: Windows 7
Reference: https://github.com/priologic/easyrtc/blob/master/docs/easyrtc_installing.md
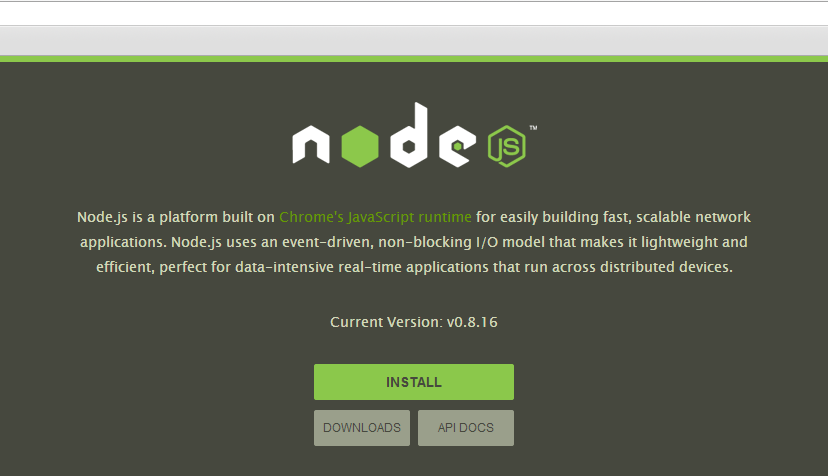
1. 請連上 http://nodejs.org/
請點選 INSTALL 下載 nodejs 安裝檔案
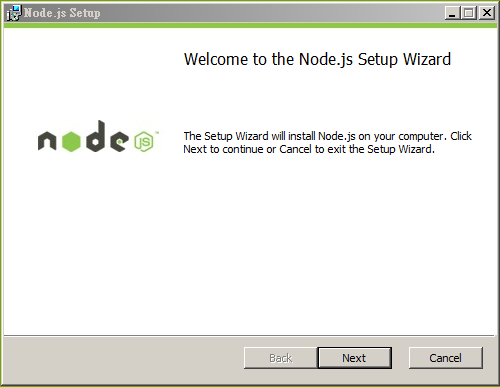
2.請點選執行安裝 nodejs

3. 請點選 Next 開始安裝
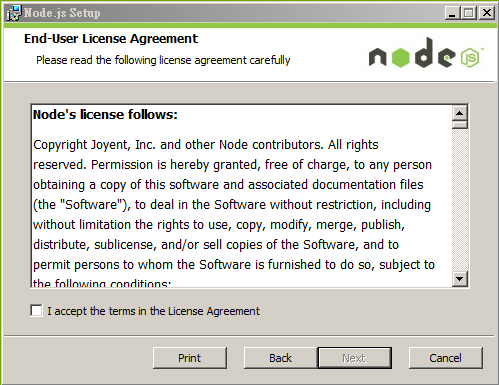
4. 請勾選 “I accept the terms in the LIcense Agreement” → 請點選 Next
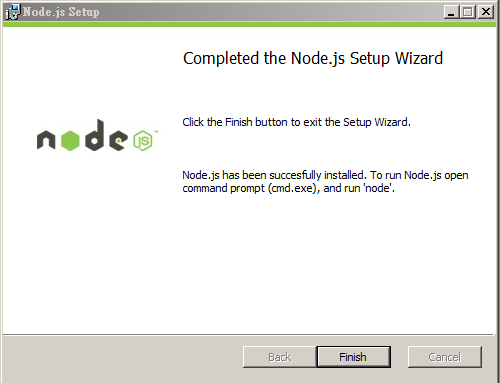
5. 請點選 Finish 完成 Node.js 安裝
6. 請連線到 http://www.easyrtc.com/
請點選 Download easyRTC beta, FREE!

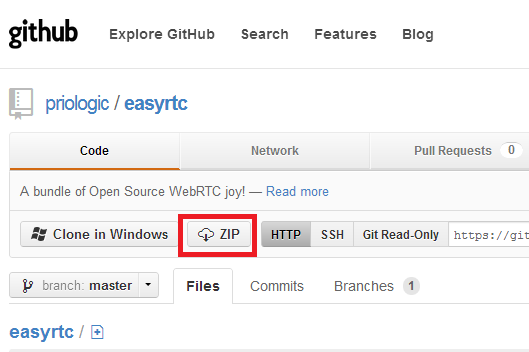
7. 畫面會被重導向到 https://github.com/priologic/easyrtc
請點選 Clone in Windows 旁邊的 ZIP 圖示
8. 請將 .zip 檔案解壓縮到指定目錄
例如 C:\Users\使用者帳號\nodes\easyrtc
解壓縮的檔案會解壓縮到 C:\Users\max\nodes\easyrtc\easyrtc-master

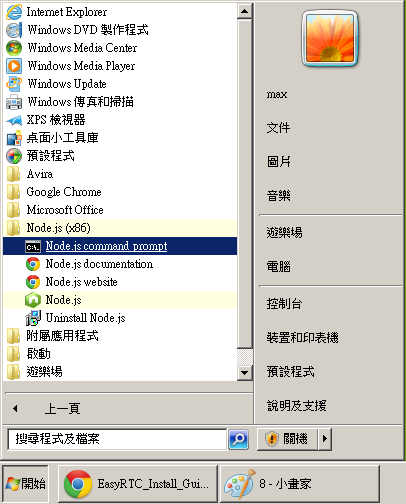
9. 啟動 node.js command line
請點選 開始 → 所有程式 → Node.js → Node.js command prompt
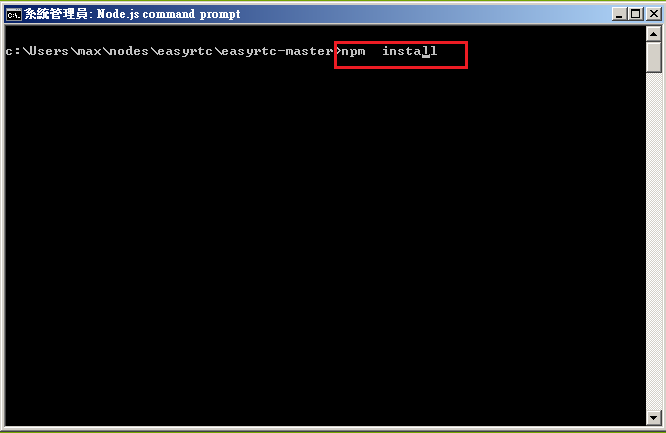
10. 請於node.js command line 切換到easyRTC 安裝目錄
請輸入 cd C:\Users\max\nodes\easyrtc\easyrtc-master (當初解壓縮目錄)

11. 請輸入 npm install 開始安裝 EasyRTC
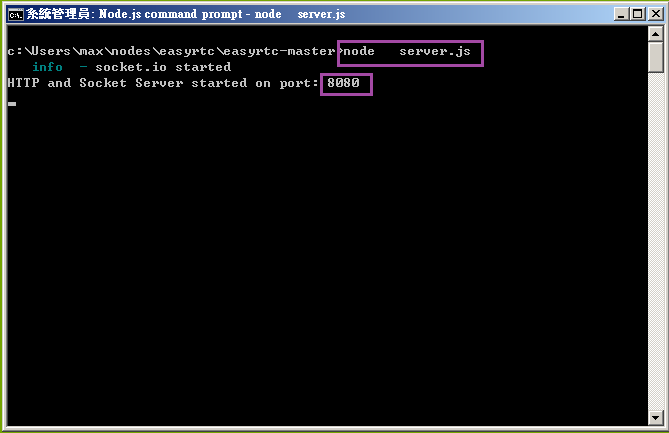
12. 啟動 EasyRTC
請輸入 node server.js
預設會在 port 8080 LISTEN
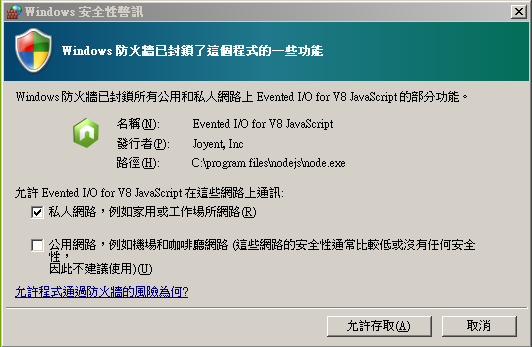
13. 如果有 Windows 安全性警訊, 請點選 允許存取
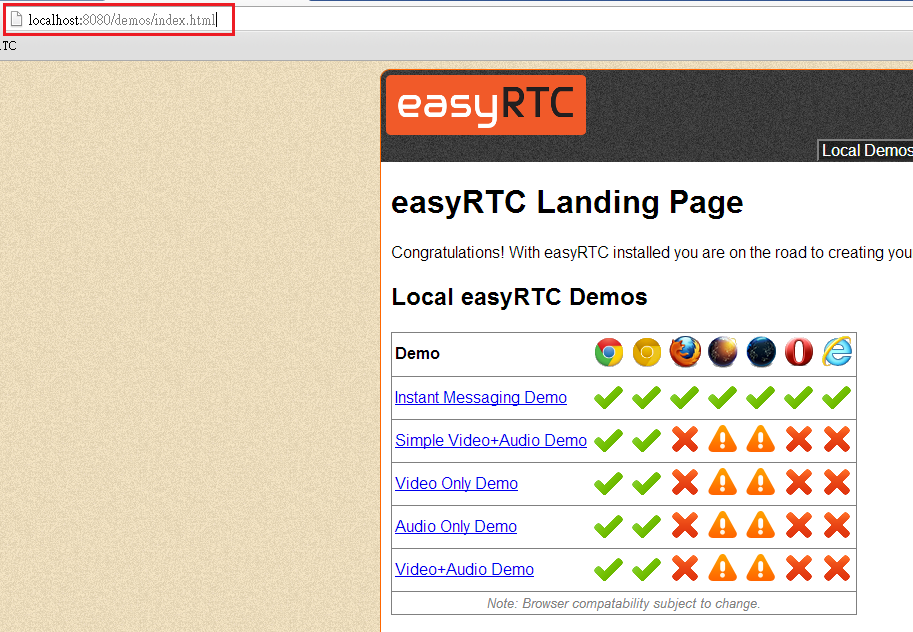
14. 請於瀏覽器輸入http://localhost:8080 或是 http://自己的IP:8080
開始測試
測試時間: 2012/12/22
建立環境: Windows 7
Reference: https://github.com/priologic/easyrtc/blob/master/docs/easyrtc_installing.md
1. 請連上 http://nodejs.org/
請點選 INSTALL 下載 nodejs 安裝檔案
2.請點選執行安裝 nodejs
3. 請點選 Next 開始安裝
4. 請勾選 “I accept the terms in the LIcense Agreement” → 請點選 Next
5. 請點選 Finish 完成 Node.js 安裝
6. 請連線到 http://www.easyrtc.com/
請點選 Download easyRTC beta, FREE!
7. 畫面會被重導向到 https://github.com/priologic/easyrtc
請點選 Clone in Windows 旁邊的 ZIP 圖示
8. 請將 .zip 檔案解壓縮到指定目錄
例如 C:\Users\使用者帳號\nodes\easyrtc
解壓縮的檔案會解壓縮到 C:\Users\max\nodes\easyrtc\easyrtc-master
9. 啟動 node.js command line
請點選 開始 → 所有程式 → Node.js → Node.js command prompt
10. 請於node.js command line 切換到easyRTC 安裝目錄
請輸入 cd C:\Users\max\nodes\easyrtc\easyrtc-master (當初解壓縮目錄)
11. 請輸入 npm install 開始安裝 EasyRTC
12. 啟動 EasyRTC
請輸入 node server.js
預設會在 port 8080 LISTEN
13. 如果有 Windows 安全性警訊, 請點選 允許存取
14. 請於瀏覽器輸入http://localhost:8080 或是 http://自己的IP:8080
開始測試
沒有留言:
張貼留言