星期日, 9月 26, 2021

AWS CDN 練習小記

AWS CDN 練習小記


這篇 Blog 是搭配 AWS Users Group Taiwan Meetup 的分享題目 "AWS 初心者系列 - CDN - CloudFront 101" 


簡報 URL https://bit.ly/sakana20210923 

活動 URL https://awsugtw.kktix.cc/events/awsug-202109


AWS Users Group Taiwan Facebook https://www.facebook.com/groups/awsugtw 


練習架構如下


 個人管理的  CNAME 指向 AWS CloudFront 分佈, 來源為  AWS S3 服務


首先來建立 Origin Server


==== Origin Server  - S3 =====


登入 Amazon S3 服務 https://s3.console.aws.amazon.com/s3/home (或是服務搜尋 S3  )


點選 Create bucket


輸入 Bucket 名稱: 這邊以 sakana20210910 為例 ( S3 名稱必須具唯一性 )

選取 AWS Region: 這邊我選 Asia Pacific ( Tokyo ) ap-northeast-1


因為是要進行 CDN 的練習實驗

這邊 取消勾選 Block all public access

勾選 I acknowledge that the current settings might result in this bucket and the object within becoming public.
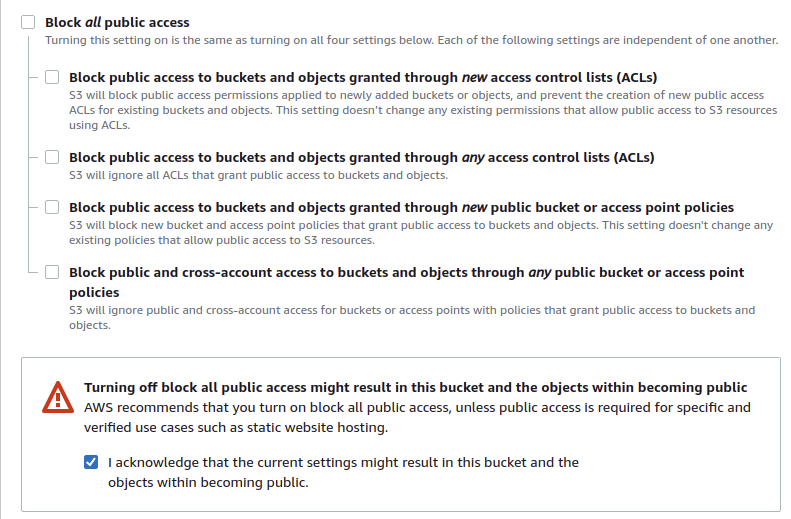

  • 這個動作就是將這個 S3 公開存取


其他按照預設值

點選 Create bucket


可以看到 Bucket 顯示在清單內

點選剛剛建立的 Bucket


點選 Upload 上傳檔案


可以使用拖曳的方式或是點選 Add files 或是 Add folder 來選取檔案或是資料夾


這邊我上傳一張 opensusetaiwan.png 為例子


點選 Upload 開始上傳


勾選剛剛上傳的檔案

點選 Actions -- > Make public


點選 Make public
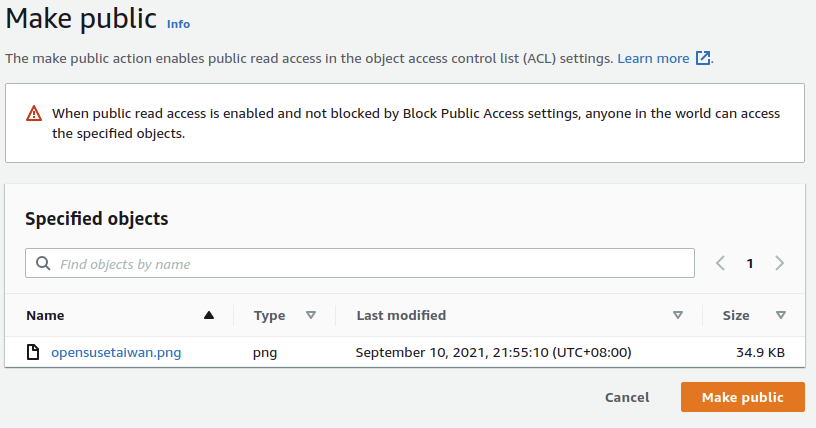


點選 Close 關閉 Make public:status


然後點選剛剛上傳的檔案


點選 Object URL 或是在新分頁開啟 URL
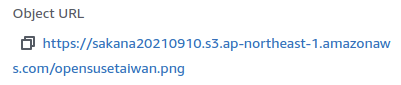


就可以觀察到相關圖片


接下來因為之後 CNAME 會指向 AWS 的 CloudFront , 然後希望要有 HTTPS 的存取, 所以來設定憑證服務


==== 準備 AWS Certificate ====


登入 AWS Certificate Manager 服務


Region: N. Virginia (us-east-1)


點選 Get started


選取 Request a public certificate -- > 點選 Request a certificate
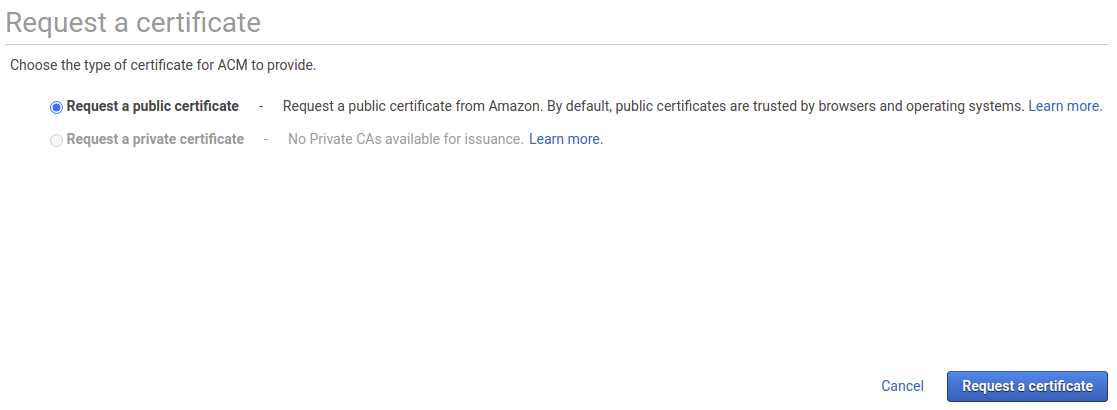


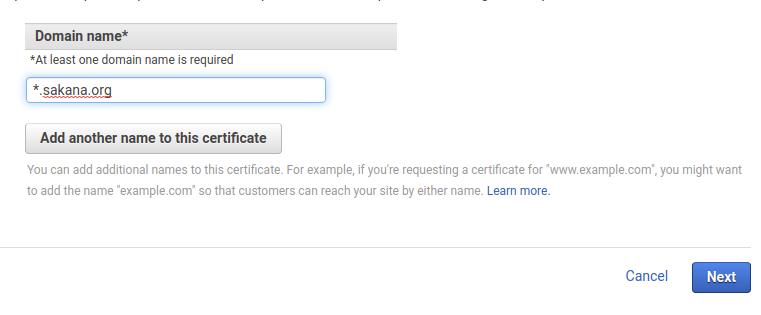
Domain name 的部份輸入自己控管的 Domain

例如 *.sakana.org

點選 Next


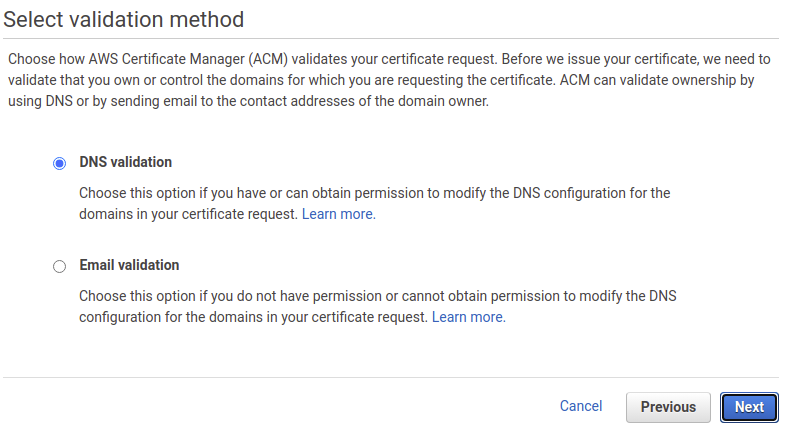
選取驗證方式 DNS validation

點選 Next

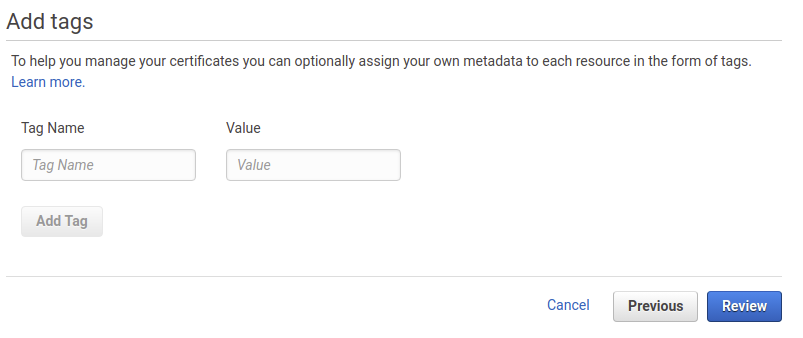
看看是否要加入 Tag

點選 Review

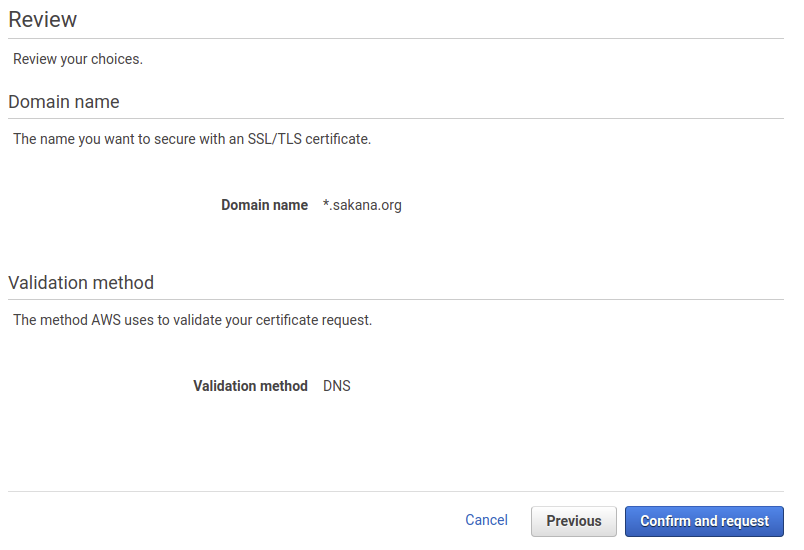
確認相關資訊

點選 Confirm and request


這個時候會出現要求驗證的 CNAME 以及相關的紀錄

  • 在自己的 DNS 管理介面( Gandi 或是其他代理商  ) 設定相關紀錄


設定完成之後 -- > 點選 Continue


驗證時間大概需要 5 分鐘左右


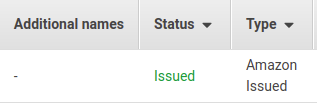
驗證成功, Status 會顯示 Issued


再來就可以處理正主, 就是 AWS CDN 服務,也就是 CloudFront


==== 建立 CDN ====


登入 CloudFront 服務 ( 可以搜尋 CloudFront )


可以點選歡迎頁面的 Create a CloudFront distribution


或是先點選左邊功能表的 Distributions


再點選畫面右上角的 Create distribution


Origin 設定:

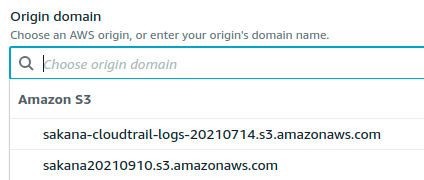
輸入或是選取 Origin domain

這邊可以選取剛剛建立的 S3


名稱的部份可以自定義


Default cache behavior 設定:

  • 可以按照自行的環境進行設定


Cache key and origin requests

  • 可以先按照預設


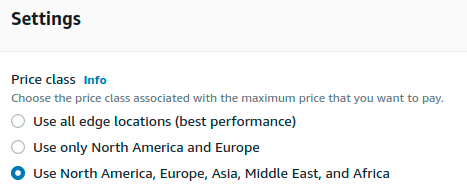
Settings 的 Price class 依照業務範圍來進行設定


點選 Create distribution


觀察相關資訊 與進行小測試


建立完成後, 點選剛剛建立分佈

觀察 Distribution domain name


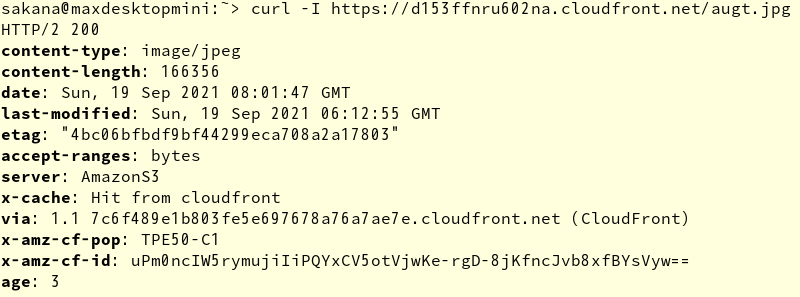
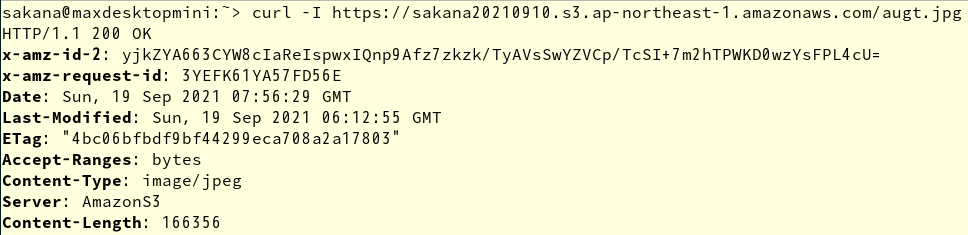
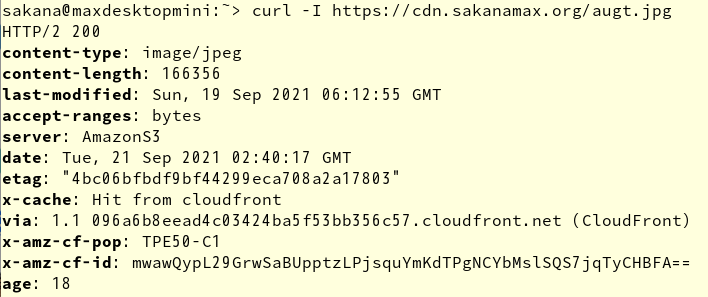
可以使用 curl 指令 分別測試 S3 路徑以及 CloudFront 相關路徑


S3 路徑


CloudFront 路徑


進行 CNAME 的設定


接下來進行 CNAME 的設定, 理由有 2

  • 實際上大多數, 不會直接使用 xxxxxxx.cloudfront.net URL 來使用, 而是用自己的 FQDN

  • 可以使用 CNAME 指向不同的 CDN 服務來達成備援


設定相對應的 CNAME 紀錄

  • 將要存取的 CNAME 紀錄設定到 CloudFront 的 Distribution domain name

    • 例如 cdn.sakanamax.org 指向  d152ffnru702na.cloudfront.net


回到 CloudFront 的服務


點選剛剛建立的分佈
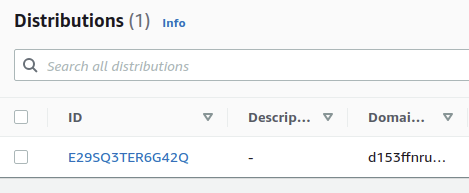


點選 General 頁籤內 Settings 的 Edit 按鈕 


點選 Alternate domain name ( CNAME ) - optional 的 Add item 按鈕



輸入 CNAME

同步也可以選取 Custom SSL certificate ( 前面在  ACM 有設定 )與 Security policy


點選 Save changes


再次進行相關測試

使用 自訂的 FQDN 來進行存取


這樣又向 AWS 前進一步 :)


~ enjoy it


Reference:


星期一, 8月 30, 2021

使用 aws cli 建立 現有 EC2 status check alarm 小記

使用 aws cli 建立 現有 EC2 status check alarm 小記


aws-cli: 2.2.4

OS: container with openSUSE Leap 15.2


因為工作上面的需要, 雲端的資源如果是上線的服務大多需要設定告警機制.

如果是在 GCP 或是 Azure 的平台上, 是可以透過設定 Tag 的方式來進行告警條件的設定, 簡化設定告警的數量, 例如


AWS CloudWatch alarm 一次監控一個指標, 而指標的維度不同, 使得每個EC2 instance的指標都是唯一的, 因此目前並沒有直接的方法可以為相同指標的所有EC2 instance創建單一個通用的CloudWatch alarm.

所以解決的方式可能就是透過 aws cli 配合 shell script 方式來進行處理, 處理上大概有 2 個方向

  • 將目前現有的 EC2 建立 CloudWatch Alarm

  • 建立 EC2 時, 建立 CloudWatch Alarm


這一篇來寫將目前現有的 EC2 建立 CloudWatch Alarm


==== 將目前現有的 EC2 建立 CloudWatch Alarm ====


先來整理一下, 如果目前有現有的 EC2, 如何針對單一的 EC2 進行建立 CloudWatch Alarm


列出目前 Region 的 EC2 ID

測試 Region: us-east-2 (Ohio)


# aws  ec2 --region  us-east-2 --output  text  describe-instances --query  "Reservations[*].Instances[*].{Instances:InstanceId}"  --profile  default


i-0864c1f7405d84941

i-0339fb4f575b549f9


  • 因為我的環境有不同的  AWS ID, 所以利用 --profile 指定環境


因為我的 CloudWatch Alarm 有結合 SNS 進行通知, 等等建立 CloudWatch Alarm 要輸入 SNS ARN, 故使用 aws sns list-topics --region us-east-2 --profile xxxxx 列出 SNS 相關資訊


# aws  sns  list-topics  --region  us-east-2  --profile  default


{

    "Topics": [

        {

            "TopicArn": "arn:aws:sns:us-east-2:783127832903:Notity_EC2_CPU_50"

        }

    ]

}


接下來使用 aws cloudwatch put-metric-alarm 指令來建立


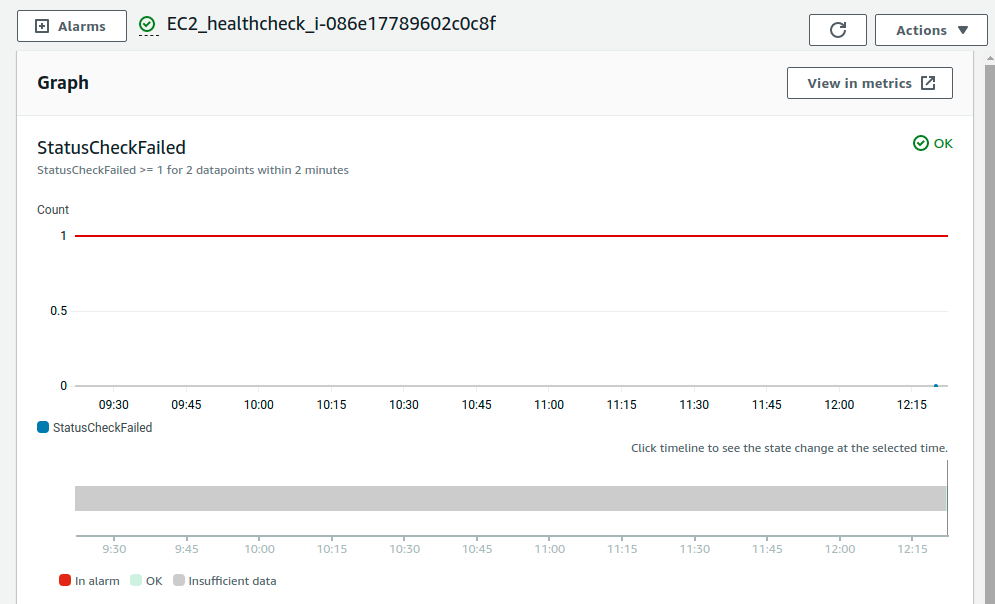
# aws  cloudwatch  put-metric-alarm  --alarm-name  healthcheck --alarm-description  "health check status failed"  --metric-name  StatusCheckFailed  --namespace  AWS/EC2  --statistic  Maximum  --period  60  --threshold  1  --comparison-operator  GreaterThanOrEqualToThreshold   --dimensions  "Name=InstanceId,Value=i-0864c1f7405d84941--evaluation-periods  2 --alarm-actions  arn:aws:sns:us-east-2:783127832903:Notity_EC2_CPU_50 --region  us-east-2 --profile  default


  • --dimensions 的 Value 請使用上面查詢到的 EC2 instance ID, SNS ARN 請換成要通知的 SNS Topic

  • 使用 EC2 的 StatusCheckFailed 這個 Metric 來判斷, 所以如果是自行停止 EC2  的狀況, 也只是資料不足

  • --period 60 - 60 秒採樣進行採樣

  • --evaluation-periods 2 - 配合 上面的 --period 60 秒, 就是 data point 為 60 秒 x2 就是 120 秒

  • --threshold 1 - 門檻值為 1, 

  • 配合比對方式 GreaterThanOrEqualToThreshod, 當 status check fail 達到 120 秒(驗證單位為 2 個 perion) (門檻值 1), 就滿足告警

  • --alarm-actions - 使用 SNS 來通知

  • 如果在使用 aws cloudwatch put-metric-alarm 指令建立的時候, 遇到同樣名稱的 alarm, 參考官網的說明是會覆蓋掉的, If an alarm with the same name already exists, it will be overwritten by the new alarm.


列出目前 Region 的 cloudwatch alarm 名稱來確認

# aws  cloudwatch  describe-alarms  --region  us-east-2  --profile default  |  grep  'AlarmName'


            "AlarmName": "healthcheck",


再來就是寫成 shell script 來針對所有的 EC2 建立 CloudWatch Alarm

建立一個 aws_create_CloudWatchAlarm_existEC2_statusCheck.sh 

內容如下


#!/bin/bash

# edit by sakana 2021/8/29

# 將特定的 Region 目前的 EC2 加上 CloudWatch 告警, 使用 StatusCheckFailed


echo ""

echo "將特定的 Region 目前的 EC2 加上 CloudWatch 告警, 使用 StatusCheckFailed"


# 設定使用 AWS 帳號

echo ""

echo "設定使用 AWS 帳號, 這邊請用您的 profile 名稱"

echo ""

read -e -p "Please enter aws account name: " -i "sakana" account_name


# 設定使用 AWS Region

echo ""

echo "設定使用 AWS Region"

echo "N.Virginia: us-east-1"

echo "Tokyo: ap-northeast-1"

echo ""

read -e -p "Please enter aws region name: " -i "ap-northeast-1" region_name


# 設定使用 SNS Topic

echo ""

echo "==== 列出目前的 SNS Topic ARN ===="

echo ""

aws sns list-topics --region $region_name --profile $account_name

echo "================================"

echo "設定使用 SNS Topic"

echo ""

read -e -p "Please enter sns arn: " -i "arn:aws:sns:xxxxxxxxx" sns_arn

echo ""


# 執行 新增 CloudWatch Alarm

echo "執行 新增 CloudWatch Alarm"

for InstanceId in `aws ec2 --region $region_name --output text describe-instances --query "Reservations[*].Instances[*].{Instances:InstanceId}" --profile $account_name`

do

  echo  ""

  aws cloudwatch put-metric-alarm --alarm-name EC2_healthcheck_$InstanceId --alarm-description "health check status failed" --metric-name StatusCheckFailed --namespace AWS/EC2 --statistic Maximum --period 60 --threshold 1 --comparison-operator GreaterThanOrEqualToThreshold  --dimensions "Name=InstanceId,Value=$InstanceId" --evaluation-periods 2 --alarm-actions $sns_arn --region $region_name --profile $account_name

  echo  ""

done


這樣應該會把目前 Region 上面的 EC2 都建立 CloudWatch Alarm :)


後續思考

  • 這個 script 的好處是目前 Region 的 EC2 都加上 StatusCheckFailed 的 Alarm, 但是如果 EC2 被移除後的管理是後續要思考的點


不過也算是又向 AWS 前進一步


~ enjoy it


Reference

星期二, 8月 10, 2021

使用 aws cloudtrail lookup-events 指令搜尋事件

使用 aws cloudtrail lookup-events 指令搜尋事件

aws cli : 2.2.4


因為工作上的需求, 可能需要定時去查詢或是紀錄特定事件

例如  RDS 上面密碼變更的行為, 但是因為 CloudTrail 預設只保留 90 天的 log


如果不想要將相關 log 轉到 S3 或是其他的地方. 目前想到 2 種方式

  1. 定時使用 aws cli 去進行相關查詢. ( 如果有特定對象的話 )

  2. 使用 AWS CloudWatch Event Rule 結合 SNS 發送通知儲存


今天來嘗試的是方式 1


AWS Resource Target:  RDS Aurora with MySQL

針對行為: 更改 masterUserPassword


實驗做法

  • 建立 RDS database

  • 更改 master User Password

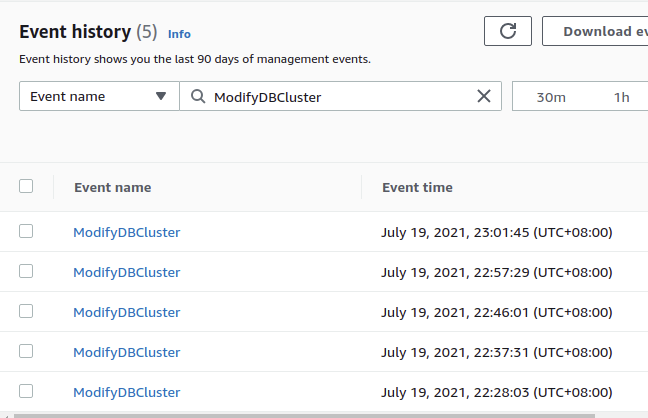
  • 去 CloudTrail 的 Event history 進行查詢


以上的方式可以在 Console 查詢到 RDS 進行 master 使用者密碼變更


那如果想要使用 aws cli 應該如何進行呢? 目前使用 aws cloudtrail lookup-events 指令來進行


首先嘗試直接下指令, 但是你會發現這樣的輸出實在太多, 效果不彰

# aws  cloudtrail  lookup-events


接下來加上限制輸出的輸量

# aws  cloudtrail  lookup-events  --max-results 1


  • 這樣好多了, 因為資料很短, 所以有助於了解輸出資料的格式


再來嘗試加上起始時間

# aws  cloudtrail  lookup-events  --start-time  2021-07-19  --end-time  2021-07-20


然後試試看加上我們要找的屬性, 使用 eventname 來進行過濾


# aws  cloudtrail  lookup-events --lookup-attributes  AttributeKey=EventName,AttributeValue=ModifyDBCluster  --region  us-east-1


  • 這邊要注意你要查詢的 Region 是否符合你的資源所在區域

  • 另外不同的 DB, 有可能是出現再 ModifyDBCluster 也有可能是 ModifyDBInstance, 這點請依照實際的狀況調整


這樣的輸出, 只要是 ModifyDBCluster 都會被列入, 但是我想要針對有變更 master password 才納入, 所以使用 jq 來進行處理


輸出的結果我們只想取出

  • userIdentity.UserName - 來知道是誰設定

  • eventTime - 事件時間

  • eventName - 事件名稱

  • awsRegion - 發生區域

  • sourceIPAddress - 來源 IP

  • requestParameters.materUserPassword - 用來識別有變更密碼行為

  • dBClusterIdentifier  - DB 名稱


例如輸出的資料為 (部份)


{

  "eventVersion": "1.08",

  "userIdentity": {

    "type": "IAMUser",

    "principalId": "AIDAJ7LK4OH5WD54F4P5U",

    "arn": "arn:aws:iam::78212783195:user/1303067",

    "accountId": "782127831905",

    "accessKeyId": "ASIA4MGTTTNQN75FOXWD",

    "userName": "1303067",

    "sessionContext": {

      "sessionIssuer": {},

      "webIdFederationData": {},

      "attributes": {

        "mfaAuthenticated": "true",

        "creationDate": "2021-07-19T14:08:35Z"

      }

    }

  },

  "eventTime": "2021-07-19T15:01:45Z",

  "eventSource": "rds.amazonaws.com",

  "eventName": "ModifyDBCluster",

  "awsRegion": "us-east-1",

  "sourceIPAddress": "59.126.193.27",

  "userAgent": "aws-internal/3 aws-sdk-java/1.11.975 Linux/4.9.230-0.1.ac.224.84.332.metal1.x86_64 OpenJDK_64-Bit_Server_VM/25.242-b08 java/1.8.0_242 vendor/Oracle_Corporation cfg/retry-mode/legacy",

  "requestParameters": {

    "dBClusterIdentifier": "test20210719",

    "applyImmediately": true,

    "masterUserPassword": "****",

    "allowMajorVersionUpgrade": false

  },

.... (恕略)


最後的指令為


# aws  cloudtrail  lookup-events  --lookup-attributes  AttributeKey=EventName,AttributeValue=ModifyDBCluster  --region  us-east-1  --query  'Events[*].CloudTrailEvent'  |  jq  -r  '.[]'  |  jq  -c  '. | select(.requestParameters.masterUserPassword) | {username: .userIdentity.userName, eventTime: .eventTime, eventName: .eventName, awsRegion: .awsRegion, sourceIPAddress: .sourceIPAddress, masterUserPassword: .requestParameters.masterUserPassword, dBClusterIdentifier: .requestParameters.dBClusterIdentifier}' | jq .


  • jq 的部份

    • -r               output raw strings, not JSON texts;

    • -c               compact instead of pretty-printed output;

  • 這邊要讓自己記住的 jq 用法

    • 用 select (  ) 選取我們希望要符合的資料, 以這個例子來說就是 .requestParameters.masterUserPassword 

    • 使用  | pipe 串接後, 用 大括號  {  }, 然後用冒號為區隔, 定義輸出欄為名稱與 value, 例如 輸出名稱 username: 內容去對應 .userIdentity.userName


輸出參考


{

  "username": "1303067",

  "eventTime": "2021-07-19T14:28:03Z",

  "eventName": "ModifyDBCluster",

  "awsRegion": "us-east-1",

  "sourceIPAddress": "59.127.193.27",

  "masterUserPassword": "****",

  "dBClusterIdentifier": "test20210719"

}


這樣又跟 AWS 靠近一步

~ enjoy it


Reference: